

Key Takeaways
- This toilet paper roll birdhouse craft turns recycled tubes into sweet hanging ornaments for spring, Easter, Christmas, Earth Day, or a rainy-day project.
- You only need recycled toilet paper rolls, thin cardboard from a cereal box, paint, glue, scissors, and string or ribbon.
- The project is kid-friendly: toddlers can paint, preschoolers can help decorate, and older children can measure, cut, and assemble with less assistance.
- Finished toilet paper roll birdhouses can hang on an Easter tree, Christmas tree, spring garland, classroom display, or homeschool nature-study site.
- Below, you’ll find step-by-step directions, decorating ideas, safety notes, display tips, and a short FAQ to complete the craft with confidence.
Introduction: Turn Toilet Paper Rolls into Tiny Birdhouses
Recycled toilet paper rolls can be transformed into birdhouse ornaments, making them a fun craft for both kids and adults. In about 30–45 minutes, you can turn a plain toilet paper roll into a colorful birdhouse ornament with a painted body, a tiny roof, and a hanging loop.
This eco-friendly craft reuses cardboard tubes that might otherwise go straight into the recycling bin. It is a wonderful idea for spring decorating, Easter trees in March or April, Earth Day on April 22, and Christmas tree ornaments in December.
It also works well at home, around a classroom craft table, or in homeschool nature and bird-study themes. Toilet paper roll birdhouse crafts can be made for various occasions, including Easter and Christmas, and can also serve as fun spring decorations.
One important note: this is a decorative birdhouse, not a real outdoor birdhouse. A real functional birdhouse needs weatherproof wood, drainage, ventilation, predator protection, and the correct entrance size for specific birds. This project is purely decorative and should stay indoors.
- Materials and Tools for Your Toilet Paper Roll Birdhouse Craft
- Prepare the Toilet Paper Rolls and Cardboard Pieces
- Step-by-Step: How to Make a Toilet Paper Roll Birdhouse
- Decoration Ideas for Paper Roll Birdhouses and Birds
- Ideas for Displaying Your Toilet Paper Roll Birdhouses
- Tips, Variations, and Safety Notes
- FAQ: Toilet Paper Roll Birdhouse Craft
Materials and Tools for Your Toilet Paper Roll Birdhouse Craft
To make a birdhouse from a toilet paper roll, you will need recycled toilet paper rolls and a cardboard box for the roof. Thin cardboard from a cereal box works especially well because it bends easily into a cone.
Here’s what to gather:
Material | Why you need it |
|---|---|
Recycled toilet paper rolls or toilet paper tubes | Main body of the birdhouse |
Thin cardboard from a cereal box | Roof, base, wings, signs, and small decorations |
White glue or tacky glue | For attaching the roof, base, perch, and embellishments |
Scissors | For cutting the roll, door, roof, and cardboard pieces |
Pencil and ruler | For sketching the door and measuring roof pieces |
String, twine, or ribbon | For the hanging loop |
Hole punch | Helpful for making clean holes near the top |
Paintbrushes | For base color and small details |
For paint, choose based on age and mess level: |
- Acrylic paint gives strong color and coverage for older kids.
- Washable tempera paint or poster paint is better for younger children.
- Good spring palettes include pastel yellow, mint green, sky blue, soft pink, lavender, and peach.
For children’s crafts, look for non-toxic, water-based supplies. The U.S. Consumer Product Safety Commission states that lead in paint on children’s products must not exceed 0.009% by weight, or 90 ppm, and many art supplies also carry ASTM D-4236 labeling.
Optional embellishments include:
- Felt scraps
- Colored paper
- Markers or paint pens
- Buttons
- Fabric scraps
- Mini pom-poms
- Sequins
- Twine
- Tiny faux birds
- Small paper sign labels, such as “Bluebird Cottage”
Protect your work area with old newspaper from 2025–2026 issues, a plastic tablecloth, aprons, or old T-shirts. A drying tray or baking sheet lined with parchment keeps wet projects organized and reduces craft table traffic during group work.
If toilet paper rolls are not available or allowed in your setting, use paper towel rolls cut in half, craft tubes, or mailing tubes, or even incorporate sheets of handmade paper for unique creative projects as accents or backgrounds.
Prepare the Toilet Paper Rolls and Cardboard Pieces
Before painting, prep each paper roll so the finished birdhouse stands evenly and the roof attaches neatly.
- Inspect each toilet paper roll
Make sure the roll is clean and dry. Remove loose paper, gently reshape dents, and trim rough edges. - Cut the tube if desired
The first step in creating a toilet paper roll birdhouse is to cut the roll in half and then decorate it as desired before adding a roof. A full roll also works, but a half roll creates a smaller ornament that is lighter for garlands and trees. - Sketch the birdhouse door
Lightly draw a round, oval, arch, or heart-shaped opening about 3–4 cm from the bottom of the tube. The door should sit in the middle of the front. - Cut out the door
Carefully cut along the pencil line. Adults should handle this step for toddlers and preschoolers, especially if scissors need to enter the cardboard at an angle. - Make the base
Place the end of the toilet paper roll on thin cardboard and trace around it. Cut out the circle and test-fit it so it sits just inside the bottom edge. - Glue in the floor
Add glue around the lower inside edge of the tube and press the cardboard circle into place. Let it dry for at least 15–20 minutes. - Add hanging holes now or later
If you want the birdhouse to hang, punch two small holes near the top of the paper roll now, or wait until after painting.
Quick classroom tip: If you are preparing this on a Monday for a class later in the week, cut doors, bases, and roof shapes in advance and store each child’s pieces in a labeled bag.
Step-by-Step: How to Make a Toilet Paper Roll Birdhouse
This is the core project. Work through each step in order, and let paint and glue dry before moving to the next stage.
Step 1 – Paint the Paper Roll
Paint the entire outside of each toilet paper roll in a base color. Cover the area around the cut door opening and paint the inside edge of the door for a cleaner finish.
Let the roll dry completely for about 20–30 minutes. Drying time depends on paint thickness, room temperature, and humidity.
Step 2 – Add Details
Once the base coat is dry, add details around the birdhouse door. Kids can paint:
- Bricks
- Wooden planks
- Polka dots
- Flowers
- Vines
- Leaves
- Window shapes
- A tiny welcome sign
Older kids can look at real backyard birdhouses and mimic the color, roof shape, or wood pattern. This is a simple way to learn about design, birds, and habitats while making a creative ornament.
Step 3 – Create a Perch
Poke a small hole under the door. Insert a short piece of craft stick, a twig, or a small dowel.
Add glue inside the tube where the perch enters the cardboard. Hold it in place for a moment, then set it aside to dry.
Step 4 – Make the Roof from Cardboard
Cut a circle of cardboard about 2–3 cm wider than the toilet paper roll diameter. Snip one straight line from the outside edge to the center.
Overlap the cut edges to create a cone roof. Adjust the cone until it fits over the top of the roll, then glue or tape the overlap.
A decorative hanging paper birdhouse can be made using cardstock and basic craft supplies, so cardstock is a good substitute if you do not have cereal box cardboard, and a quick guide to the best types of paper for craft projects can help you choose sturdy materials.
Step 5 – Paint and Decorate the Roof
Paint the roof in a contrasting color. For example:
- Sky blue roll + yellow roof
- Mint green roll + pink roof
- White roll + red roof
- Brown roll + mossy green roof
Add stripes, shingles, dots, or scalloped paper pieces. Let the roof dry before attaching it, so the paint does not smear.
Step 6 – Attach the Roof
After decorating the toilet paper roll, glue the roof made from a cardboard box onto the top to complete the birdhouse.
Place a thin line of glue around the top rim of the roll. Gently press the painted cardboard cone roof onto the glue. Hold it for about one minute, then leave it upright to dry.
Step 7 – Add a Hanging Loop
Use a hole punch through the roof peak or upper tube. Thread string, ribbon, or twine through the hole and tie a secure loop.
Now your birdhouse ornament is ready to hang once the glue is fully dry.
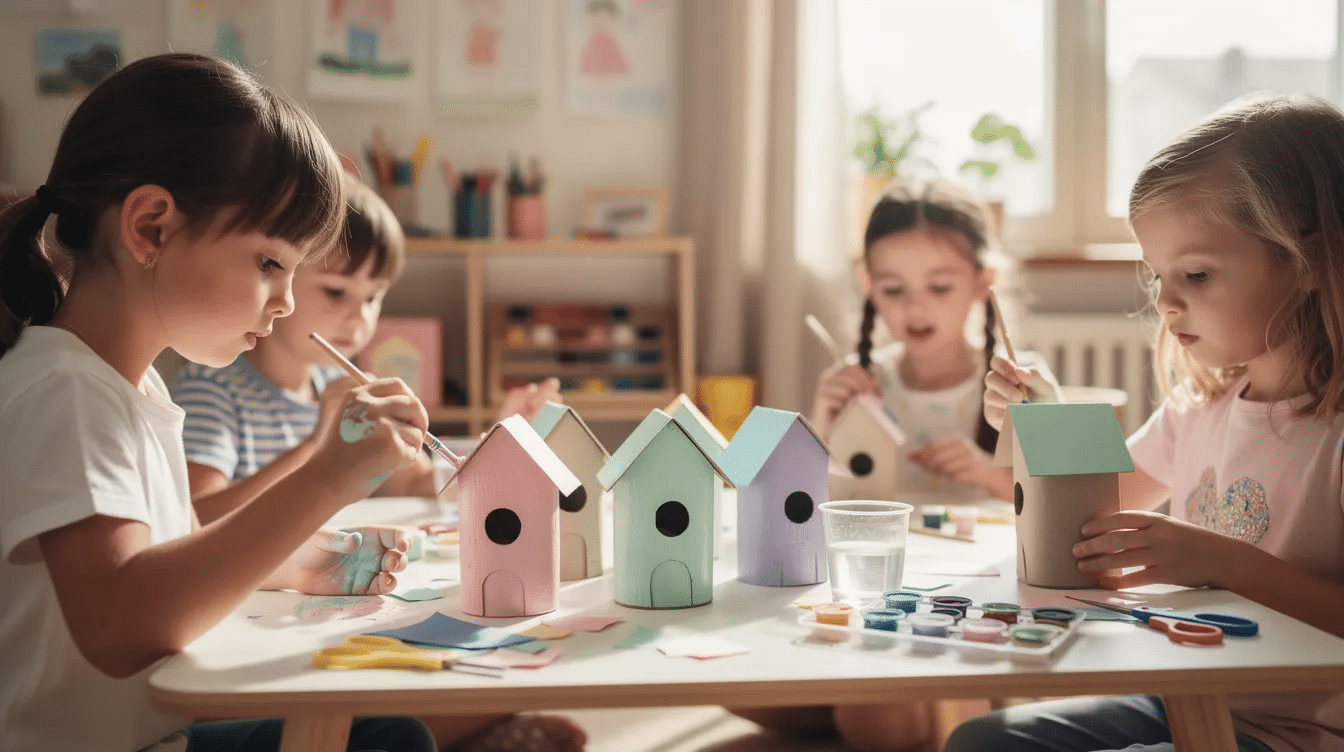
For small groups, toddlers, and preschoolers, prepare cutting steps ahead of time so children can focus on painting and decorating. Older children can handle more measuring, tracing, and assembly work with supervision.
Secure the Roof to Finish Each Toilet Paper Roll Birdhouse
The roof is the part most likely to loosen over time, so take a few extra minutes here.
Use thicker tacky glue for a stronger hold. A small amount of low-temperature hot glue can also work well, but it should be applied by an adult.
After placing the roof on the toilet paper roll, gently rotate it so the front of the cone lines up above the birdhouse door. This small adjustment makes the ornament look more polished.
Let the birdhouse dry completely before hanging it. Overnight drying is ideal because the roof bond sets more firmly and the paint has time to cure.
If the cone does not fit snugly:
- Trim the bottom edge of the roof slightly.
- Add a narrow strip of cardboard inside the top of the tube as a support ledge.
- Use a lighter roof material, such as cardstock, if the cardboard is too heavy.
Decoration Ideas for Paper Roll Birdhouses and Birds
Once the basic birdhouse shape is done, kids can personalize each paper roll with seasonal themes, nature-study details, or tiny toilet paper roll birds.
Try these color schemes, or explore creative flamingo craft ideas for fun projects if you want to add more whimsical birds to your display:
Theme | Colors and details |
|---|---|
Easter | Pastel yellow, mint, pink, lavender, tiny flowers |
Christmas | Red, green, white, metallic dots, ribbon loop |
Summer | Turquoise, bright yellow, orange, leafy vines |
Woodland | Brown, cream, moss green, twine, faux wood grain |
Nature study | Colors based on robins, bluebirds, goldfinches, or chickadees |
Using recycled cardboard for fun, eco-friendly crafts like cardboard boxes and toilet paper rolls can create unique and colorful birdhouse projects. For a cottage look, glue moss, twine, or tiny paper leaves to the roof. You can also paint wood grain with a thin brush or draw vines climbing up the sides. | |
Toilet paper roll crafts can be used to create colorful birds, which can be painted to resemble real bird patterns as part of a nature study, and there are many creative toilet paper roll craft ideas for family projects and other fun paper activities for creative minds of all ages you can explore beyond birdhouses. |
Here’s a quick mini-tutorial for toilet paper roll birds:
- Cut a short section from a roll.
- Close one end by folding or pinching it.
- Shape the other end into a small head.
- Paint the body like a robin, bluebird, or goldfinch.
- Add cardboard wings, a beak, and drawn or glued eyes.
A simple method to make a toilet paper roll bird involves closing one end, shaping the other end, and adding wings and a beak made from cardboard, or you can experiment with creative uses of paper mache for art projects to sculpt larger birds and accessories.
Kids can name their birds and birdhouses, then create a small cardboard yard or nest using shredded paper around the base, or even fold a few creative paper ducks with simple origami techniques to join the scene. This makes the project feel complete and gives every child a favorite finished piece to share.
Ideas for Displaying Your Toilet Paper Roll Birdhouses
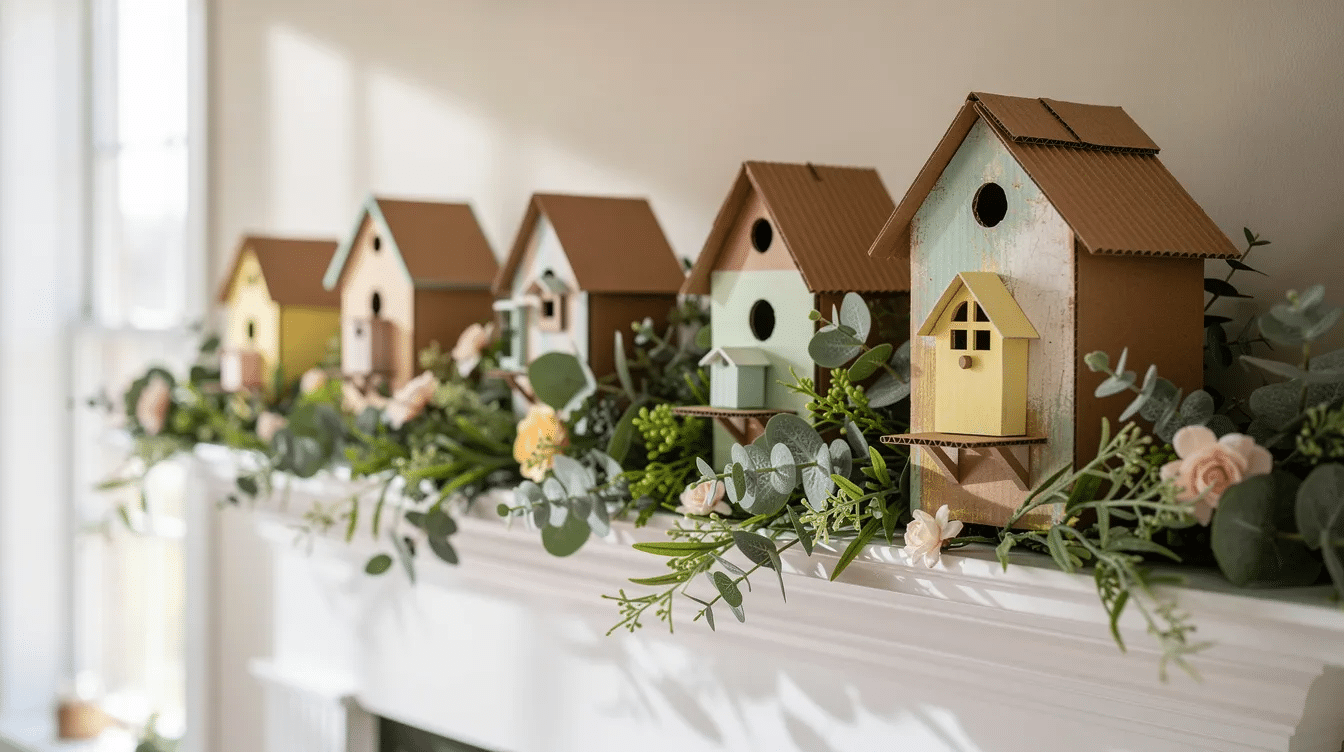
These birdhouses are lightweight, so they are easy to display around the home, classroom, or party space.
You can:
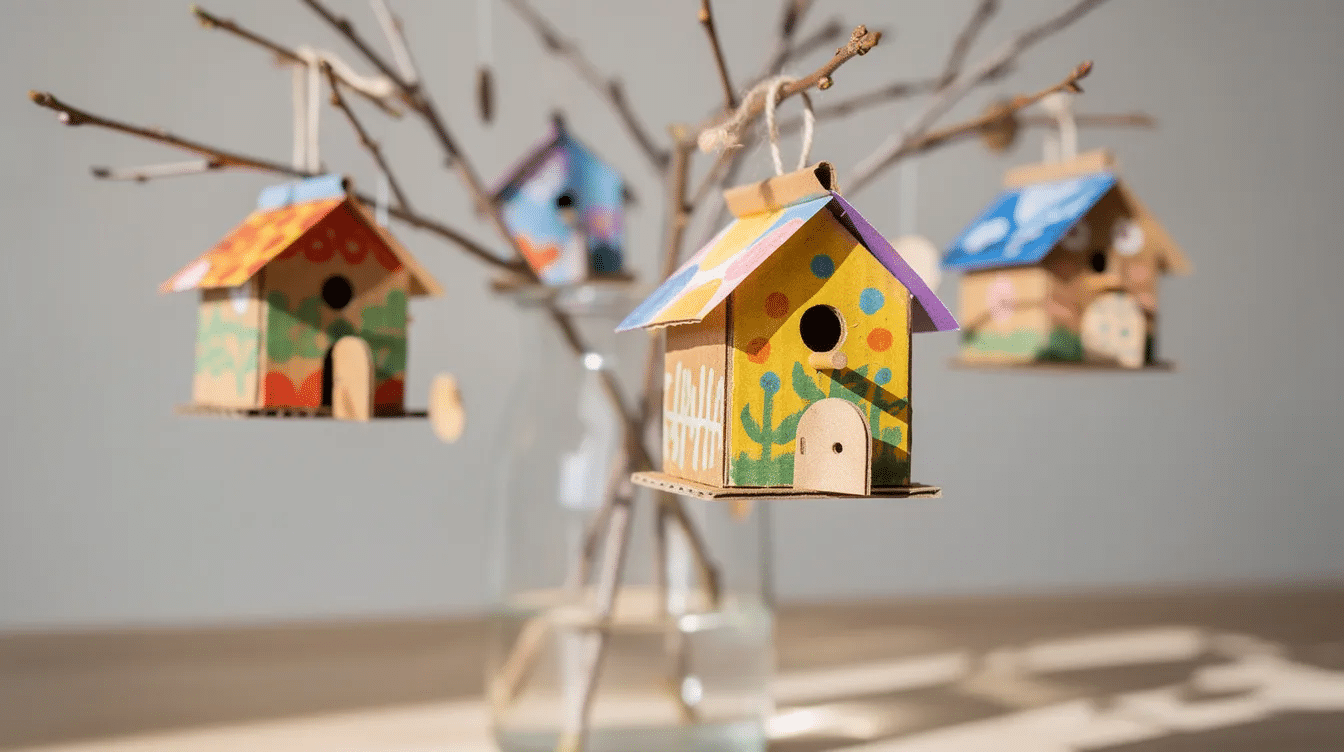
- Hang 6–10 birdhouses on a tabletop Easter tree in late March.
- Add them to a spring branch in a vase.
- Use them as handmade ornaments on the family Christmas tree in December.
- String several paper roll birdhouses onto twine to create a spring garland.
- Attach them to a classroom bulletin board.
- Use them as chair-back decorations for a bird-themed birthday party or baby shower.
- Label each birdhouse with a bird species name for a homeschool or elementary nature unit, or design printable labels, tags, and signs to make organizing and displaying the projects easier.
Crafting with recycled materials, such as toilet paper rolls, is an engaging activity that can be enjoyed during various seasons, including spring and holidays, and pairs nicely with cute paper craft ideas for fun DIY projects when you want additional decorations to match your birdhouses.
Keep these ornaments indoors. Toilet paper rolls and cardboard soften in humidity or rain, and outdoor moisture can cause warping, mildew, peeling paint, or roof failure. Cardboard also loses strength in high humidity, so dry storage matters. For long-term storage, a cool, dry box is best.
Tips, Variations, and Safety Notes
Different ages and settings may need different versions of this toilet paper roll birdhouse craft. The project is easy to adapt for safety, time, and available materials, and you can look to paper crafting inspiration and tutorials to spark new variations for your group.
Age-based tips
- Toddlers: Paint large surfaces and stick on big foam or paper shapes.
- Preschoolers: Help glue doors, roofs, and simple decorations.
- Older kids: Measure, cut, create roof cones, add fine details, and make matching birds.
Fast variations
- Use markers instead of paint for a low-mess version, or experiment with different craft paper supplies for creative projects if you want to switch from cardboard to paper-based birdhouses.
- Precut all roofs and bases for groups of 10–20 children.
- Use pre-colored paper rolls for a quick party project.
- Add an email-style name label inside the roll if multiple kids are making similar ornaments.
- Keep a small craft log of paint colors and ideas if you plan to repeat the project next season.
Safety reminders
Adults should handle sharp scissors, craft knives, and hot glue. Supervise young children with buttons, sequins, pom-poms, and other small embellishments, since these can be choking hazards.
For safe children’s art supplies, the American Academy of Pediatrics recommends choosing products that are clearly labeled non-toxic and age-appropriate through resources such as HealthyChildren.org.
If you adapt toilet paper tubes for wild birds
This article focuses on decorative indoor ornaments. If you make a separate wild-bird feeder or nesting-material holder from toilet paper tubes, use bird-safe materials, and consider adding seasonal accents like paper snowflake winter decorations around the display for a festive touch.
- Use un-dyed wool, clean straw, or pet fur as natural nesting materials in toilet paper rolls during spring.
- In summer, peanut butter should be replaced with natural vegetable shortening to prevent spoilage or melting.
- Avoid using heavy-duty glues, glitter, or acrylic paints when making bird feeders for wild birds.
- Birdseed blends that are preferable for feeders include sunflower seeds, millet, and safflower.
Storage tips
Store finished birdhouses in a labeled cardboard box between seasons. Pad roofs and perches with tissue paper so they do not bend, or repurpose vintage paper craft elements like old book pages and sheet music to wrap and label your birdhouse ornaments in a charming way. Keep the box away from damp basements, hot attics, and direct sun.
If you ever see an error in how a roof was glued, do not pull hard. Instead, cut away loose glue, enter a small bead of fresh tacky glue under the roof edge, and press gently until secure. Thanks to the flexible cardboard, most mistakes are easy to fix.
FAQ: Toilet Paper Roll Birdhouse Craft
Can I use paper towel rolls instead of toilet paper rolls?
Yes. Paper towel rolls work well. Cut each paper towel roll into two or three shorter tubes roughly the height of a standard toilet paper roll. Because paper towel tubes can be slightly larger, scale up the roof and base pieces.
How long do these cardboard birdhouses last?
With indoor use and gentle handling, toilet paper roll birdhouses can last for several seasons, including Easter 2026, Christmas 2026, and beyond. Store them in a dry box with tissue paper around the roof and perch.
Are these birdhouses safe to hang outside?
They are decorative and made from paper, so they are not weatherproof. Light, covered porch use for a short event is fine, but rain, dew, and humidity will damage the cardboard.
What glue works best for attaching the roof and perch?
Thicker tacky glue or school glue works well for children. Low-temperature hot glue, applied by an adult, is useful for fast-drying and extra-strong attachment of the roof, wooden perch, or twig perch.
Can I turn this into a group project for a classroom or party?
Yes. It is ideal for groups of 10–20 kids if you pre-cut roofs and bases, set up paint stations, and allow at least one hour for painting, drying, and decorating. If you are the activity owner, prepare extra rolls, roof pieces, and glue so one missing piece does not slow down the group.



