Hey there! Are you ready to explore the top paper mache designs? Paper mache is a versatile craft technique suitable for various projects that anyone can enjoy. Whether you’re a beginner or a seasoned artist, there’s always something new to create. Remember to thoroughly cover the armature with layers of paper strips to ensure a smooth finish and structural integrity.
Here are some cool ideas to get you started:
- Masks: Perfect for Halloween or just for fun!
- Bowls: Make them colorful and unique.
- Sculptures: Let your imagination run wild.
Remember, paper mache is all about creativity. Use paper strips, glue, and cardboard to shape your designs. Don’t forget to paint and decorate when you’re done. Let’s get crafting and see what amazing things you can make!
Key Points:
- Introduction to Paper Mache: Paper mache is a fun, versatile craft technique that has been used for centuries to create lightweight, sturdy art pieces and objects, perfect for all skill levels.
- Understanding Papier Mâché: The term means ‘chewed paper’ in French, describing the process of mixing paper with a binder to create pulp for shaping various objects, often enhanced with textiles or mixed media.
- Creating Paper Mache Paste: Make your paste by mixing flour, water, and glue until smooth, using hot water and adjusting consistency for optimal adhesion and durability.
- Building Armatures with Wood Glue: Construct sturdy frameworks for larger projects using wood glue and cardboard or wood pieces, allowing ample drying time for stability before applying paper mache layers.
- Applying and Finishing Layers: Dip paper strips into paste and apply smoothly to your armature, allowing each layer to dry completely, then decorate with paint, markers, or sealants for a polished look.
- Introduction to the Art Form
- Understanding Papier Mâché
- Creating Paper Mache Paste
- Working with Paper Mache Clay
- Building Armatures with Wood Glue
- Applying Paper Mache Layers
- Decorating and Finishing Techniques
- Creative Project Ideas
- Top Paper Mache Ideas: Unleash Your Creativity
- Tips for Success
- Common Challenges
- Advanced Techniques and Materials
- Inspiration and Ideas
- Conclusion and Next Steps
- FAQ's
- What are some decoration options after completing a paper mache project?
- How should I apply paper mache layers for the best results?
- What materials can I use to build sturdy armatures for larger projects?
- How do I create a strong paper mache paste?
- What are some beginner-friendly paper mache project ideas?
Introduction to the Art Form
- Paper mache is all the rage.
- For centuries, this awesome craft technique has been used to make all kinds of stuff. Just layer paper on a surface and boom – you’ve got yourself a sculpture or art piece! Paper mache is a light yet sturdy material, making it ideal for various projects.
- Want a fun way to express yourself? Paper mache is it. Anyone can do it. Kids. Adults. Beginners. Pros.
- Beautiful and Long-lasting: Use the right techniques and materials, and your paper mache creations will stand the test of time. Make sure each layer is thoroughly dried before adding the next to ensure durability.
- Eco-Friendly: You don’t need fancy materials. Use recycled stuff! Paper mache leaves a smaller footprint on the earth, making it perfect for those who want sustainable hobbies.
Understanding Papier Mâché

- The term papier mâché, meaning “chewed paper” in French, describes the process of mixing paper with a binder to form a pulp.
- This pulp is then molded or shaped to create objects of varying forms, including intricate designs.
- Papier mâché can be strengthened with textiles or boiled cardboard to produce durable and sturdy items.
- Additionally, papier mâché can be enhanced by using mixed media, such as combining different types of paper and textiles.
- Common binding agents in papier mâché include glue, starch, and wallpaper paste.
- As a versatile medium, papier mâché can be used to create a wide array of objects, from small decorative pieces to large-scale sculptures. Every part of the armature should be fully covered to ensure strength and support.
Creating Paper Mache Paste

- To make paper mache paste, combine flour, water, and glue in a bowl. Using a whisk helps create a smooth, lump-free mixture.
- The most important tip is to use hot water to make a nice smooth paste.
- The resulting mixture should be smooth and lump-free, with a consistency akin to thick paint.
- Adjust the paste’s consistency by adding more flour or water to suit your preference. Squeezing excess paste from the paper strips before applying them is crucial for achieving the right consistency.
- You can enhance the paste’s strength and durability by incorporating additional materials such as paper strips or cardboard.
- Applying medium heat can accelerate the drying process, but be cautious not to overheat, as this may cause the paste to become too runny.
Working with Paper Mache Clay
Paper mache clay is a game-changer for anyone looking to add intricate details and textures to their projects. Unlike traditional paper strips, paper mache clay offers a pliable and moldable medium that can be shaped into fine details and complex patterns. To create your own paper mache clay, mix paper mache paste with glue, flour, and water in a bowl until you achieve a thick, workable consistency. You can make paper mache clay using toilet paper and glue. This clay can be easily molded with your fingers or sculpting tools, allowing you to create detailed shapes and textures.
For added creativity, try incorporating different materials like cardboard, newspaper, or fabric into your clay. This not only adds texture but also makes your designs more unique. Whether you’re crafting a detailed sculpture or adding fine details to a mask, paper mache clay opens up a world of possibilities. So, roll up your sleeves and start experimenting with this versatile medium!
Building Armatures with Wood Glue
Creating a sturdy framework, or armature, is essential for supporting your paper mache projects, especially larger or more complex designs. Wood glue is an excellent choice for constructing these frameworks, providing strong and stable support. Start by cutting and shaping your cardboard or wood pieces to form the basic structure of your project. Apply wood glue evenly to the joints and allow it to dry completely before adding your paper mache layers. You should let your armature dry overnight after applying the first layer.
Using wood glue ensures that your armature is robust enough to hold multiple layers of paper mache paste and strips without collapsing. For additional stability, you can use tape to hold the pieces in place while the glue dries. Once your armature is ready, you can start layering your paper mache, confident that your structure will support your creative vision. This technique is particularly useful for larger projects like sculptures or decorative boxes.
Learn how to construct sturdy frameworks for your paper mache projects using wood glue for added stability.
Applying Paper Mache Layers
- To apply paper mache layers, dip paper strips into the paste and adhere them to the surface.
- Torn newspaper strips lay smoother on the form than cut strips.
- Ensure the strips are fully saturated with paste before applying them, squeezing out any excess paste to achieve effective adhesion and structural integrity.
- Ensure the strips are applied smoothly and evenly, avoiding wrinkles or air pockets.
- Utilize various tools, such as a brush or sponge, to apply the paste and smooth out the layers.
- Additional ingredients like paint or plaster can be added to the layers to create unique textures.
- Allow each layer to dry thoroughly before adding the next to prevent the paper mache from becoming too heavy or fragile.
Decorating and Finishing Techniques
- Once the paper mache is dry, you can decorate and finish it using various techniques. Different recipes for paper mache paste can be used to achieve various finishes.
- Painting is a popular method for decorating paper mache, which can be done using a brush or sponge.
- Other materials like markers or colored pencils can also be used to add color and detail.
- To protect the paper mache, apply a layer of varnish or sealant, which will also provide a smooth, glossy finish. Managing the sticky nature of the paste is crucial for a smooth, adhesive layer.
Creative Project Ideas
- Paper mache can be used to create a wide range of objects, from decorative items to functional pieces.
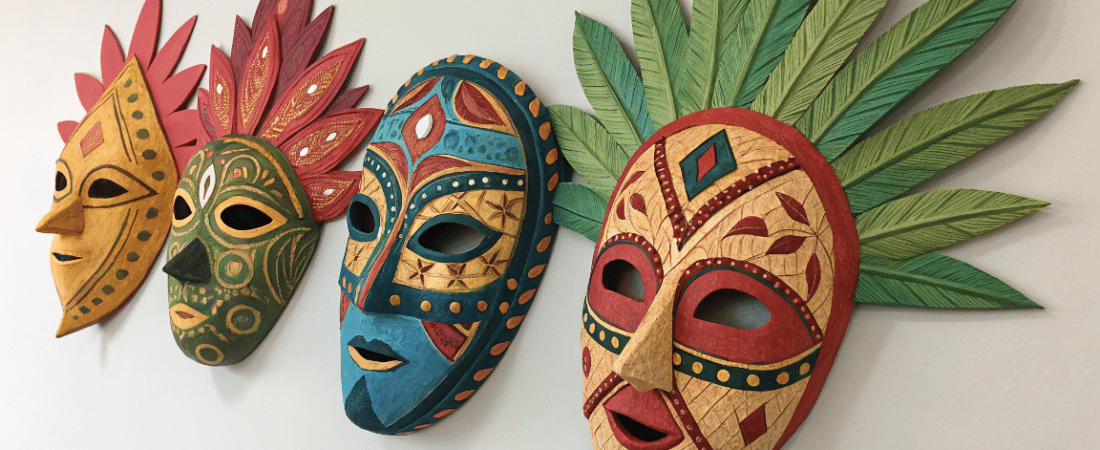
- Some creative project ideas include crafting masks, sculptures, and decorative boxes.
- You can also make functional items like bowls and vases using paper mache.
- Users can make a variety of paper mache creatures.
- Find inspiration online, in craft books, or come up with your own unique ideas and designs.
- Remember to enjoy the process and be creative, experimenting with new techniques and ideas.
Top Paper Mache Ideas: Unleash Your Creativity
Animal Sculptures: Craft lifelike or whimsical animals using paper strips and paper mache clay. From majestic elephants to playful puppies, the animal kingdom offers endless inspiration.

Decorative Bowls: Create unique and colorful bowls that can serve as both functional and decorative pieces. Experiment with different shapes and sizes to suit your style.

Masks: Perfect for Halloween, theater, or just for fun. Design masks ranging from elegant masquerade styles to spooky or fantasy themes.

Vases and Planters: Make stunning vases or planters that add a personal touch to your home decor. Use cardboard and paper strips to form the basic shape before adding details with paper mache clay.

Wall Art: Design intricate wall hangings or 3D art pieces that become the focal point of any room. Incorporate mixed media for added texture and depth.
Fantasy Creatures: Let your imagination run wild by creating mythical creatures like dragons, unicorns, or fairies. Use paper mache clay for detailed features and textures.

Jewelry and Accessories: Craft unique jewelry pieces such as necklaces, bracelets, or earrings using lightweight paper mache. Add beads, paint, or glitter for extra flair.
Miniature Houses or Buildings: Build charming miniature houses or architectural models. This project is ideal for those who love intricate details and storytelling through craft.

Themed Boxes: Design decorative boxes for storage or as gifts. Customize them with different themes, patterns, and colors.

Seasonal Decorations: Create festive decorations for holidays like Christmas, Easter, or Thanksgiving. Think ornaments, centerpieces, or wreaths.
Tips for Success
- Success in paper mache requires patience and taking your time.
- Follow instructions carefully and seek help if needed. Ask a friend or look for online tutorials to enhance your skills.
- Using the right materials and techniques ensures your paper mache is strong and durable.
- Don’t be discouraged by initial attempts; practice and experience will improve your skills. Remember, there is no wrong way to create with paper mache; mistakes can lead to unique outcomes.
- Enjoy the creative process and have fun making something with your own hands.
Common Challenges
A common challenge in paper mache is dealing with paste that’s too runny or thick.
Some people may prefer different paste recipes to achieve the desired consistency.
Adjust the paste’s consistency by adding more flour or water.
Achieving a smooth, even surface can be done using various tools and techniques.
Air pockets or wrinkles can be resolved by applying more layers of paste and paper.
With practice and experience, you’ll overcome these challenges and create beautiful, durable paper mache pieces.
Advanced Techniques and Materials
- Once you’ve mastered the basics, experiment with advanced techniques and materials.
- Try using different types of paper, like tissue or crepe paper, or add glitter or texture paste to the mixture.
- Explore different shapes and forms, using molds or armatures for more complex designs. Silicone molds can be used for creating durable layers.
- Elevate your paper mache with advanced techniques like layering or sculpting.
- Always follow safety precautions and use protective gear, especially when using sharp objects or power tools. Paper mache techniques are often used in the production of masks and props for theatrical performances.
Inspiration and Ideas
- Draw inspiration from various sources like nature, art, or architecture for your paper mache projects.
- Browse online or in craft books for ideas and tutorials. You can navigate to specific pages for detailed paper mache recipes.
- Keep an open mind and be willing to try new things to stay inspired and motivated.
- Connect with other paper mache artists through online communities or forums to share ideas and techniques.
- Don’t hesitate to experiment and try new things—it’s all part of the creative process. The creative process allows for literally any design or detail the artist desires.
Conclusion and Next Steps
As you wrap up your paper mache journey, take a moment to appreciate the skills and techniques you’ve mastered. From mixing paper mache paste and applying layers of paper strips, to building sturdy armatures and crafting intricate designs, you’ve built a solid foundation in this versatile craft. Looking ahead, there are endless possibilities to explore. Try experimenting with different materials, shapes, and forms to keep your projects fresh and exciting.
Consider creating functional items like boxes or molds, or dive into decorative pieces such as sculptures and masks. Remember, the key to success in paper mache is patience and practice. Each project is an opportunity to refine your skills and express your creativity. Whether you’re a seasoned artist or a beginner, paper mache offers a world of possibilities. So, gather your materials, let your imagination run wild, and start your next paper mache adventure today!
FAQ’s
What are some decoration options after completing a paper mache project?
Decorate your finished piece with paint, markers, or seals like varnish to enhance its appearance and protect it from damage.
How should I apply paper mache layers for the best results?
Dip paper strips in paste, squeeze out excess paste, and smooth them onto your surface, ensuring each layer is fully saturated and dry before adding the next for durability.
What materials can I use to build sturdy armatures for larger projects?
Use cardboard or wood pieces assembled with wood glue, allowing ample drying time, and secure the joints with tape if needed to ensure stability.
How do I create a strong paper mache paste?
Combine flour, water, and glue in a bowl, using hot water for a smooth, lump-free mixture with a consistency similar to thick paint, and adjust the ingredients as needed.
What are some beginner-friendly paper mache project ideas?
Beginners can start with simple projects like masks, decorative bowls, or small sculptures to get comfortable with the materials and techniques.


