

Key Takeaways
- Beginners can make a complete paper bead bracelet in about 60–90 minutes, using recycled paper and simple tools.
- This tutorial covers how to cut, roll, seal, and string paper beads, including easy ways to mix them with glass beads.
- No jewelry experience is required, and kids around 8+ can join with supervision.
- Reusing magazines, junk mail, brochures, flyers, and gift wrap makes this a budget-friendly craft with an eco-friendly twist.
- The FAQ at the end covers durability, sealing, kid safety, and how to make beginner beads look more polished.
Introduction to Paper Bead Bracelets
A paper bead bracelet is exactly what it sounds like: a bracelet made from paper strips that are rolled into beads, sealed, and strung onto elastic or string. It is cheap, relaxing, low-mess, and perfect for beginners in 2026 because you can make it with supplies already on your table.
Once sealed, a rolled paper bead can look surprisingly similar to painted wooden or glass beads. Glossy magazine pages, gift wrapping paper, junk mail, and colorful brochures all create different patterns, so every bracelet feels unique.
In this post, you will learn paper bead bracelet ideas for beginners that use simple elastic cord, recycled paper, and optional accents like charms, seed beads, or glass spacer beads. By the end, you will know how to create several easy styles for yourself, gifts, kids’ crafts, or even matching two bracelets with a friend.
- Basic Supplies for Beginner Paper Bead Bracelets
- How to Cut Paper for Your First Paper Beads
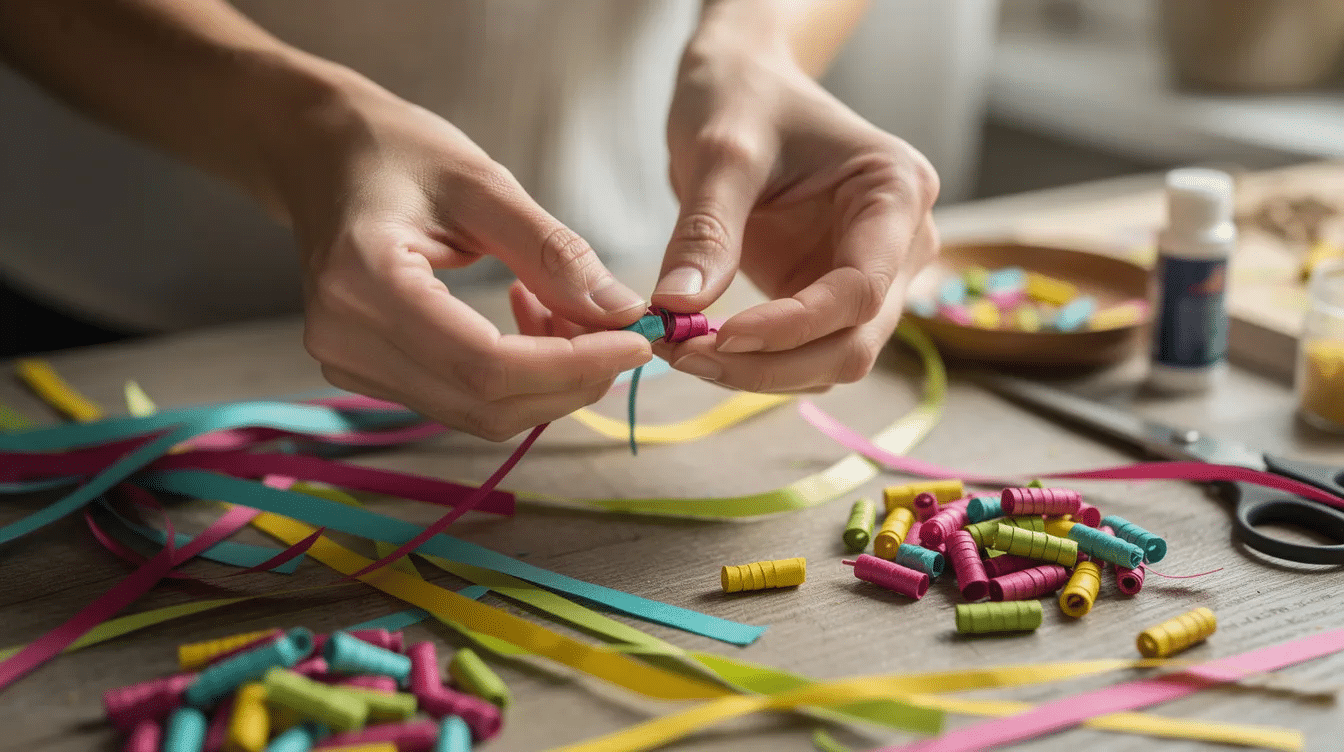
- Rolling and Gluing Your First Paper Beads
- Sealing Paper Beads so They Last
- Simple Elastic Paper Bead Bracelet for Absolute Beginners
- Beginner-Friendly Paper Bead Bracelet Design Ideas
- Tips for Making Paper Beads Look More Professional
- Caring for Your Paper Bead Bracelets
- Frequently Asked Questions About Paper Bead Bracelets
- Conclusion
Basic Supplies for Beginner Paper Bead Bracelets
Most materials are household items or low-cost craft basics. To create paper bead bracelets, you will need recycled paper such as old magazines, junk mail, or gift wrapping paper. If you are curious about other options, you can explore different types of paper used in crafts to see how cardstock, kraft, and specialty papers might change the look of your beads. Recycled paper beads can be made from various materials such as junk mail, magazines, brochures, and gift wrapping paper.
You will need:
- Recycled paper: glossy magazine pages from 2020–2026 issues, an old magazine, colorful store flyers, old calendars, brochures, or gift wrap; pair these with top craft paper supplies for creative projects if you want to expand into other DIY paper crafts.
- Cutting tools: scissors, a paper trimmer, or a craft knife with a cutting mat.
- Measuring tools: ruler and pencil to measure and draw your strips.
- Rolling tools: a toothpick, bamboo skewer, pencil, or similar stick.
- Adhesive: glue stick, tacky glue, or white craft glue.
- Bracelet supplies: 0.7–1 mm elastic beading cord or string, about 9–10 inches per bracelet.
- Accent beads: seed beads, wooden spacers, glass beads, jade-colored beads, or tiny metal spacers.
- Sealer: clear nail polish, acrylic sealer, Mod Podge Gloss, or water-based varnish in a small bottle.
- Work surface items: scrap paper, a soft cloth, or cardboard to cover the table and reduce mess.
- Optional upgrades: bead stopper, tape, jewelry pliers, clasps, crimp covers, and charms.
Essential tools for making paper beads include scissors, a glue stick, and a pencil or toothpick for rolling the paper. You will also need elastic beading cord or string to assemble the beads into a bracelet.
How to Cut Paper for Your First Paper Beads
The easiest technique for beginners is the triangle strip method. Triangle strips create classic barrel-shaped beads because the paper builds up in the center as you roll, and once you are comfortable with the basics you can branch out into creative paper bead jewelry ideas like necklaces and earrings.
Choose one colorful magazine page and trim off rough edges. One magazine page can yield enough strips to create beads for approximately three bracelets, depending on the page size and bead width.
To make paper beads, start by cutting a magazine page into strips approximately 1/2” wide and 7-8” long, then cut each strip diagonally to create triangle shapes. A simple way to do this is to mark 1/2 inch intervals along the bottom edge and top edge of the page, then connect the marks diagonally with your ruler.
Keep beginner strip widths between 3/8 inch and 3/4 inch. The length of the strip determines the thickness of the bead, while the width of the base determines the final length. Thicker paper, like brochure or cardstock weight, makes sturdier chunky beads. Thin glossy magazine paper makes smoother, smaller beads that are easier to roll, while handmade paper sheets for creative projects give a more textured, artisanal look if you decide to make your own paper first.
Quick note: if a strip starts to tear, don’t worry. Set that piece aside and use it for a tiny bead or a test roll.
Rolling and Gluing Your First Paper Beads
This is the magic step where flat paper turns into a rounded paper bead. The process of making recycled paper beads involves cutting paper into strips, rolling them around a toothpick, and securing them with glue, just like many other fun paper activities for creative minds of all ages that turn simple sheets into 3D shapes.
Place the wide end of a triangle against a toothpick or bamboo skewer. Keep the printed side facing down so the color appears on the outside. Roll the first one or two turns dry to anchor the paper.
After cutting the paper strips, roll the wide end of a strip around a toothpick, apply glue to the remaining paper surface, and tightly roll it to form a bead. Focus glue on the last few inches so the tip stays secure.
Keep the strip centered as you roll. Use one finger to guide the paper and another to tighten it gently. The bead should build toward the middle, forming a barrel or oval shape. Press the final tip flat on the backside so it does not stick up.
When the glue is tacky, slide the bead off the toothpick. The hole should stay open so you can thread it onto elastic later. If glue squishes out, wipe it with scrap paper. If the bead unrolls, add a bit more glue. If the hole closes, reinsert the toothpick before the bead dries.
Sealing Paper Beads so They Last
Sealing makes paper beads harder, glossier, and more resistant to sweat or occasional splashes. Once the beads are rolled and glued, they can be optionally sealed with clear nail polish to make them more water-resistant before stringing them onto a bracelet.
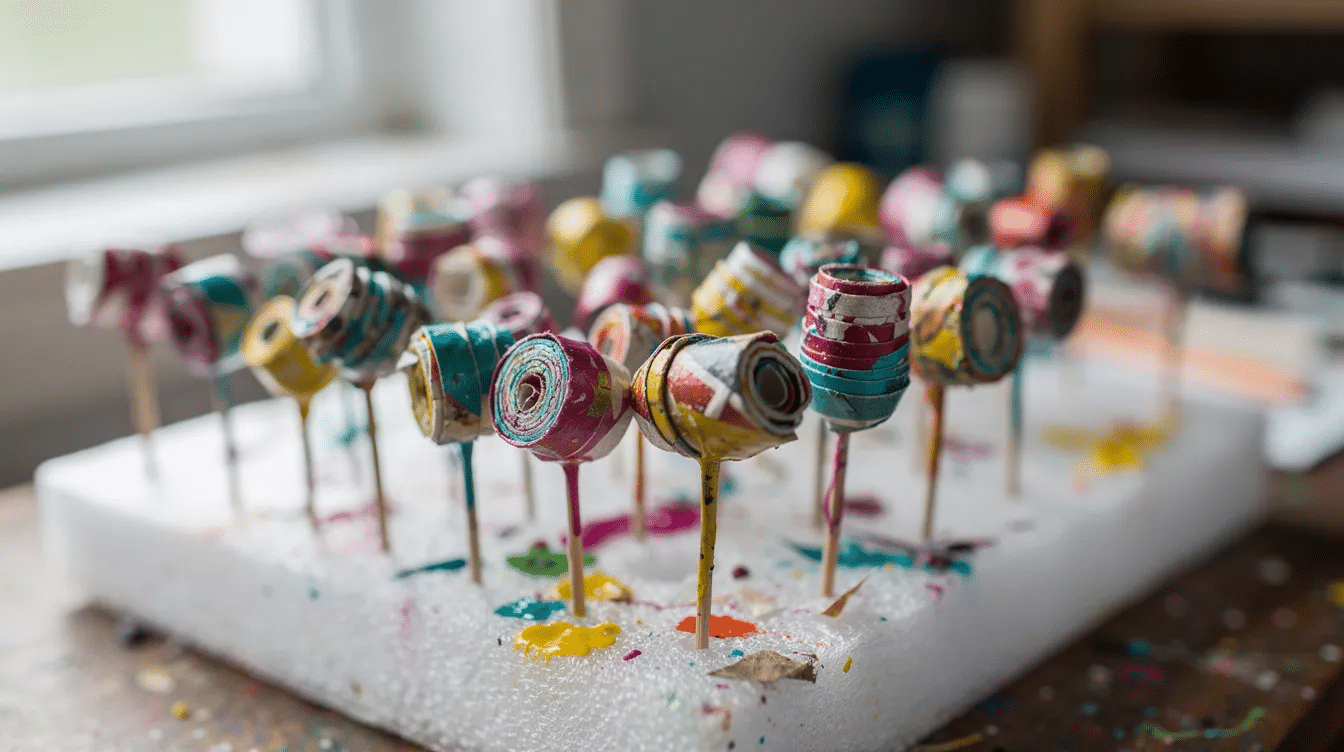
For a beginner method, leave each bead on a toothpick and brush on a thin coat of clear drugstore nail polish. You can also brush the rolled beads with an acrylic sealer or Mod Podge Gloss to harden the paper and make it water-resistant.
For a more kid-friendly option, use water-based craft varnish or diluted white glue in one or two thin layers. Poke toothpicks upright into styrofoam, floral foam, or corrugated cardboard so the beads dry without flat spots.
Wait 30–60 minutes between coats, then let the beads cure for several hours or overnight before stringing. Even sealed paper bead bracelets should not be worn in the shower, pool, or heavy rain.
Simple Elastic Paper Bead Bracelet for Absolute Beginners
Elastic bracelets are the fastest way to turn paper beads into wearable jewelry. They do not need a clasp, and they are forgiving while you learn, making them perfect to pair with cute paper craft ideas for fun DIY projects if you are crafting with kids or family.
Measure your wrist with a tape measure or a strip of paper. Cut a piece of elastic beading cord about 9–10 inches long so you have extra cord for tying. Pre-stretch the elastic gently before adding beads.
To string the beads, organize them in a desired order, cut a piece of elastic beading cord about 9-10” long, and tie a knot after stringing the beads to secure them in place. A typical adult bracelet needs about 8–12 medium paper beads; a child’s bracelet may need 6–8. Make sure you have enough beads before you start.
Try this pattern:
- 1 paper bead
- 1–3 small glass beads
- 1 paper bead
- Repeat until it fits the wrist
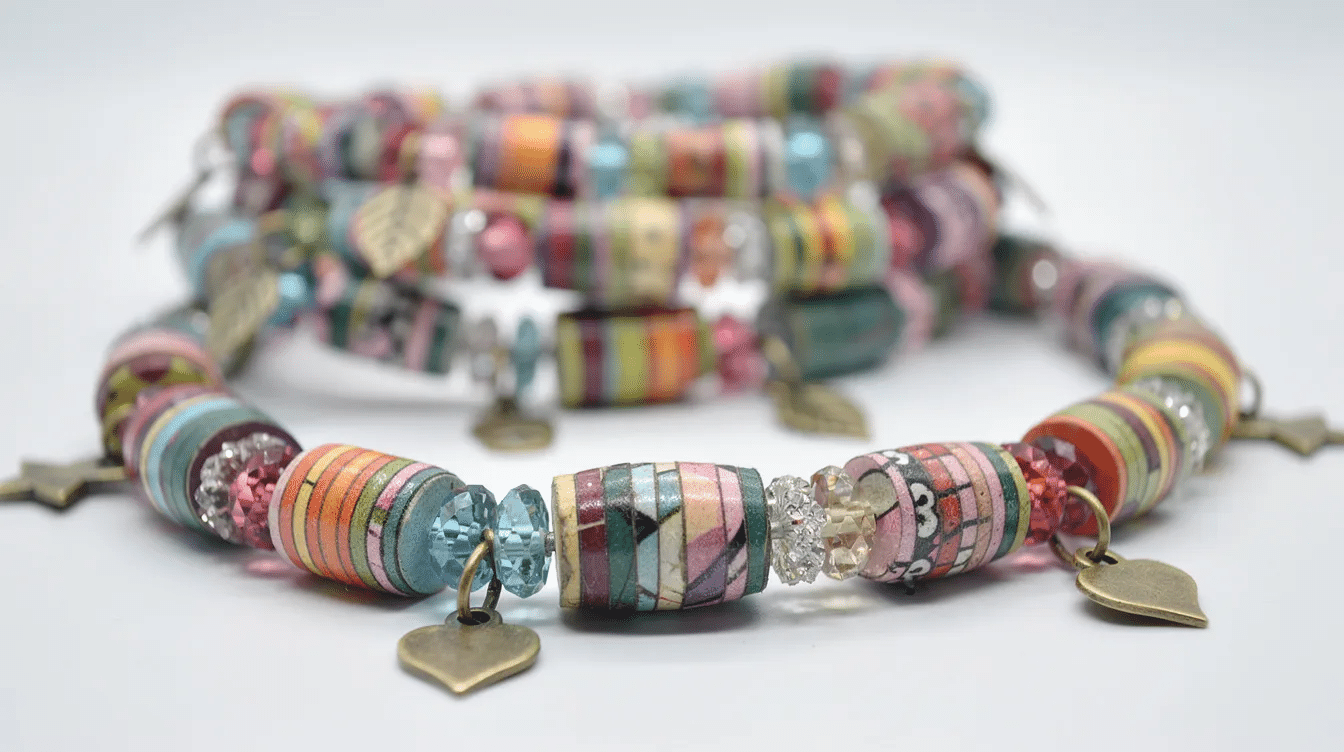
Combining paper beads with small glass or wooden spacer beads breaks up the texture and prevents the beads from shifting too much. Once the bracelet fits, tie a square knot or surgeon’s knot, add a tiny dab of clear glue, trim the ends, and hide the knot inside a nearby bead if possible.
Beginner-Friendly Paper Bead Bracelet Design Ideas
Once you understand the basic process, small changes make each paper bead bracelet feel custom.
- Monochrome bracelet: Use pages with mostly one color, such as green, blue, cream, or black-and-white text, for a clean modern look.
- Rainbow bracelet: Cut red, orange, yellow, green, blue, and purple magazine pages, then string the beads in order.
- Mixed-material bracelet: Pair one paper bead with one metallic spacer or one glass bead for a polished jewelry-store effect, or try incorporating aged book pages or sheet music if you love vintage paper craft ideas.
- Upcycled story bracelet: Use pages from travel brochures, coffee packaging, maps, or a 2023 concert flyer to create a memory bracelet.
- Charm bracelet: Add a small loop and charm near the knot for an easy upgrade.
- Matching pair: Make two bracelets from the same stack of pages for a friend, sibling, or parent.
- Necklace test: Use the same beads for necklaces if you want a longer project later, or combine them with beginner paper quilling art techniques to add delicate swirls and coils to your jewelry.
Before stringing, sketch your pattern on paper. For example: “2 paper beads, 3 seed beads, repeat.” This helps prevent frustration and saves you from restringing the whole design.
Tips for Making Paper Beads Look More Professional
Small details in cutting, rolling, and finishing can make beginner paper beads look surprisingly high-end.
- Cut sharp triangle tips so the ends wrap smoothly.
- Keep strip widths consistent so every bead sits evenly on the wrist.
- Use similar paper thickness in one bracelet for better drape.
- Sand rough sealed edges very lightly, then add a second thin varnish coat.
- Match colors intentionally, such as blue paper with silver seed beads or neutral text beads with black glass.
- Add tiny metal spacers, crimp covers, or simple charms for a finished look.
- Store finished beads on a tray with space between them so they do not stick together.
- If you sell or gift projects, include a care note so people know paper jewelry needs gentle handling.
Making paper bead bracelets is a budget-friendly craft, but good finishing makes them look far more expensive than the supplies cost. You may be amazed how much difference one smooth sealer coat makes, especially if you ever decide to sell your work alongside other paper crafts that sell well for crafters.
Caring for Your Paper Bead Bracelets
Sealed paper bead bracelets are sturdy enough for casual wear, but they still need gentler care than metal or solid glass jewelry.
Remove the bracelet before showering, swimming, washing dishes, washing hands vigorously, or doing heavy cleaning. Store bracelets flat or gently coiled in a small box or fabric pouch away from direct sunlight, which can fade the paper.
To clean, wipe with a soft, barely damp cloth. Do not soak the beads or elastic. If the elastic stretches after months of wear, cut it carefully and restring the beads on fresh cord instead of throwing the bracelet away. When you are ready for your next project, browse Simply Paper Crafts for paper‑craft inspiration to keep experimenting with new ideas.
Frequently Asked Questions About Paper Bead Bracelets
How long does it take to make a paper bead bracelet for the first time?
Plan about 60–90 minutes for your first paper bead bracelet: 20–30 minutes to cut strips, 20–30 minutes to roll beads, and extra time for sealing and stringing. Once you are comfortable, a simple bracelet can often be completed in under an hour, especially if the beads are already sealed.
Are paper bead bracelets strong enough for everyday wear?
Yes, sealed paper beads are surprisingly sturdy for normal activities like school, office work, errands, or casual outings. They are still paper, so they are not ideal for heavy sports, rough play, or frequent water exposure.
Can kids make paper bead bracelets safely?
Children around 8 years and older can roll and string paper beads with supervision. Use non-toxic glue and varnish, and have an adult handle craft knives, sharp scissors, or any tool that could slip or fall.
What kind of paper works best for paper beads?
Glossy magazine pages, colorful gift wrap, and lightweight brochure paper roll smoothly and create bright beads. Cardstock makes thick, rigid beads, while very thin newspaper may need extra sealing to stay strong.
Can I mix paper beads with other types of beads?
Yes. Paper beads pair well with glass beads, wooden beads, seed beads, metal spacers, and charms. Keep heavier beads near the front of the bracelet and lighter paper beads around the sides and back for comfort.
Conclusion
Paper bead bracelet ideas for beginners are simple, affordable, and flexible enough for a ton of creative projects. Start with one page, one toothpick, and one glue stick, then build from there.
If you decided to try this tutorial, make one basic elastic bracelet first. After that, experiment with color, spacing, charms, and glass accents until your handmade jewelry feels completely your own.



