

Key Takeaways
- Sealing paper beads protects them from moisture, smudging, skin oils, and everyday wear, while making the colors look deeper and the surface feel smoother.
- This post covers three beginner-friendly options for how to seal paper beads at home: a mod podge mixture dip, spray sealant, and brush-on varnish.
- The best all-rounder for most crafters is a slightly thinner Mod Podge Gloss mixture, usually 4 parts Mod Podge to 1 part water, applied in 2–3 thin coats.
- The materials needed are simple: finished paper beads, toothpicks or fishing line, a cardboard shoe box or foam block, Mod Podge, water, and optional clear acrylic spray.
- The FAQ at the end covers durability, waterproofing, wet-weather wear, and how to stop bead holes from sealing shut.
Introduction: Why Seal Paper Beads at All?
Paper beads are small handmade beads created by wrapping paper strips around a stick, toothpick, wire, or bead making tool, then gluing the edge down to hold the shape. They have been used in handmade jewelry for generations because they are lightweight, colorful, and easy to create from magazine pages, scrapbook paper, or a printed template. If you enjoy this project, exploring other simple paper craft ideas can give you more ways to use your stash of paper. But unsealed paper beads are vulnerable to sweat, splashes, fading, scuffs, and unraveling, especially when used in bracelets that rub against skin and clothing.
Sealing paper beads means adding a clear protective layer over the outside of each bead. A good seal helps harden the surface, brighten the color, and make the finished beads more durable for normal craft use.
- Unsealed paper beads: dull, rough, easy to scuff, likely to absorb moisture.
- Sealed paper beads: glossy or satin, smoother, stronger, and more resistant to daily handling.
- Gloss or Super Gloss sealers provide a vibrant, lacquered stone look, while Matte finishes offer a more natural paper texture.
These methods are practical for home crafters in 2024–2026 and use products widely available in craft stores or online. You do not need industrial products or toxic wood hardeners for a normal jewelry project, although Minwax wood hardener is another sealing option that can be used for paper beads, providing a durable finish, if you understand its stronger fumes and safety requirements. Full waterproofing is difficult with simple craft supplies, but these methods make beads splash-resistant enough for most jewelry.
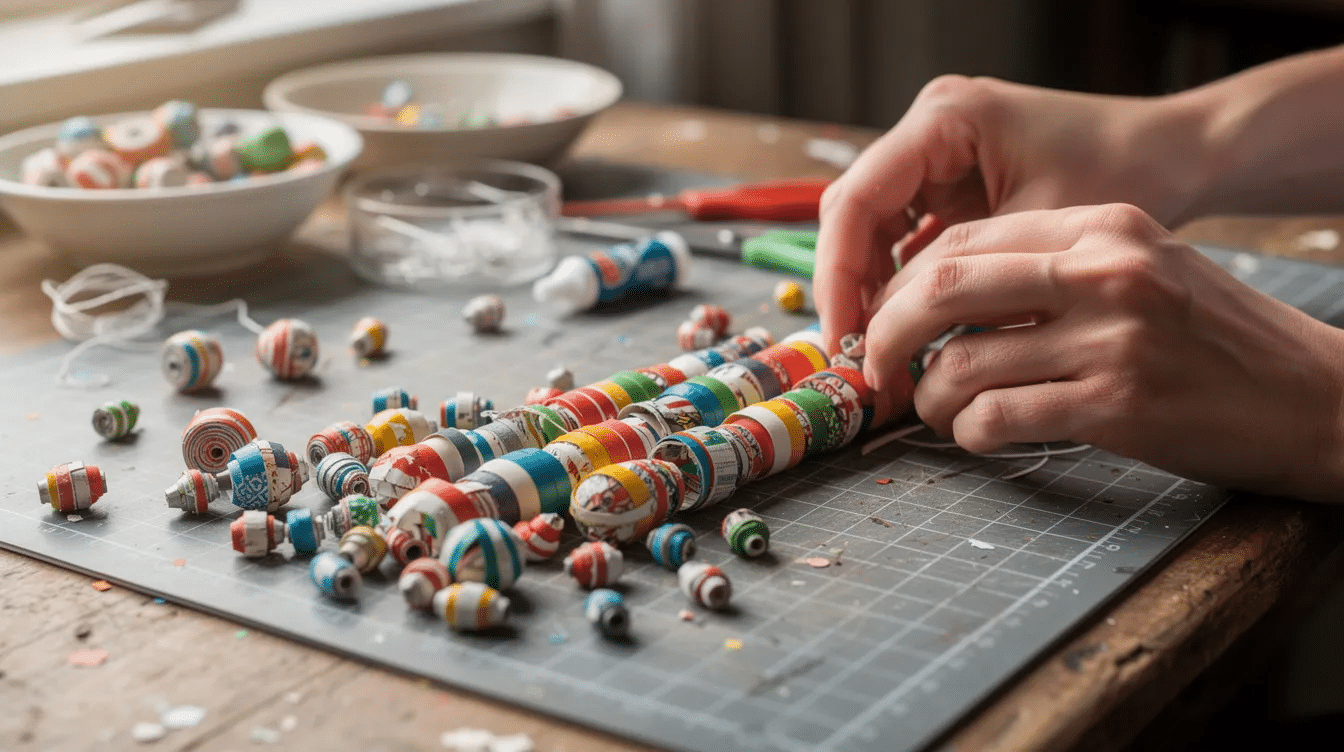
- Materials Needed for Sealing Paper Beads
- Preparing Your Paper Beads for Sealing
- Setting Up a Simple Drying Rack at Home
- Method 1: Sealing Paper Beads with a Mod Podge Mixture (Dip Technique)
- Method 2: Brushing on Mod Podge or Glue (Single‑Bead Control)
- Method 3: Spray Sealant and Varnish Dip Options
- How Waterproof Can Sealed Paper Beads Really Get?
- Common Mistakes When Sealing Paper Beads (and How to Avoid Them)
- Curing, Storing, and Using Your Sealed Paper Beads
- FAQ
- How many coats of Mod Podge do I need on each paper bead?
- Can I use regular white glue instead of Mod Podge to seal paper beads?
- Why do my sealed paper beads feel sticky even after a day?
- Is there a way to keep the holes in my paper beads from sealing shut?
- Are sealed paper beads suitable for children’s jewelry?
Materials Needed for Sealing Paper Beads
Gather everything before you mix sealant or start the dipping process. This keeps your fingers cleaner and prevents beads from drying with flat spots.
Essentials:
- Finished paper beads made from paper strips, thicker paper, magazine pages, or scrapbook paper
- Mod Podge Gloss Lustre, Matte, or Dishwasher Safe; see the manufacturer’s cure guidance for Mod Podge formulas
- Clean water for thinning
- Fine-bristled paintbrush or sponge brush for brushing on Mod Podge
- Toothpicks, bamboo skewers, or thin wire
- Fishing line or nylon thread
- Wide-mouth plastic bowl for a mod podge mixture
- Cardboard shoe box, craft foam block, or styrofoam block
Optional but helpful:
- Disposable gloves
- Pointed metal rod or awl for making holes in a box
- Small measuring cup
- Paper towels and protective table cover
- Clear acrylic spray such as Krylon Crystal Clear
- Water-based polyurethane varnish or thick craft glazes for durability and water resistance
- Clear nail polish for sealing a small bunch of accent beads in a pinch
- A jar for varnish dip work
Effective sealing of homemade paper beads can involve using Mod Podge, clear nail polish, or water-based polyurethane varnish. Choose water-based products labelled “non-toxic” or “for craft use,” especially if children may handle the beads.
Preparing Your Paper Beads for Sealing
Neat, dry beads seal better. If you used PVA glue, white glue, or a glue stick while wrapping your strips, let the rolled cores cure for at least 24 hours before adding sealant.
- Sand obvious glue ridges with 600–800 grit sandpaper, then wipe away dust.
- Threading paper beads onto a fishing line or wire and allowing them to dry completely is a recommended technique for sealing.
- Using a fishing line or thin wire is an effective setup for sealing paper beads because it keeps each bead suspended and easy to rotate.
- Leave several centimetres of length at each end of the string so you can make loops and hang the line on skewers.
- For single beads, insert toothpicks through the holes if the bead opening is wide enough.
- Coating the inside hole of the bead with sealant can help prevent moisture from warping or unraveling the bead, so do not ignore the ends.
A smart tip: do not pack beads tight on the line. Leave at least one bead-width of space between them so they do not stick together.
Setting Up a Simple Drying Rack at Home
A good drying rack prevents wet beads from touching the table, the box bottom, or one side of another bead. It also helps beads dry round instead of developing flat patches.
For a shoe box rack, punch parallel rows of small holes along the two long sides of an old cardboard shoe box. Space the holes about 2–3 cm apart. Insert toothpicks through opposite holes to create a horizontal ladder, then hang fishing-line strings of paper beads in the middle of the box.
For a foam block method, stand a craft styrofoam block or floral foam substitute on your table. Stick toothpicks or bamboo skewers upright, leaving enough room so more beads can dry without touching.
Drying apparatuses like thin bamboo skewers or toothpicks can efficiently hold paper beads while they dry. Set the rack in a dust-free, ventilated area away from pets, children, and direct sunlight that could crack the outer coat.
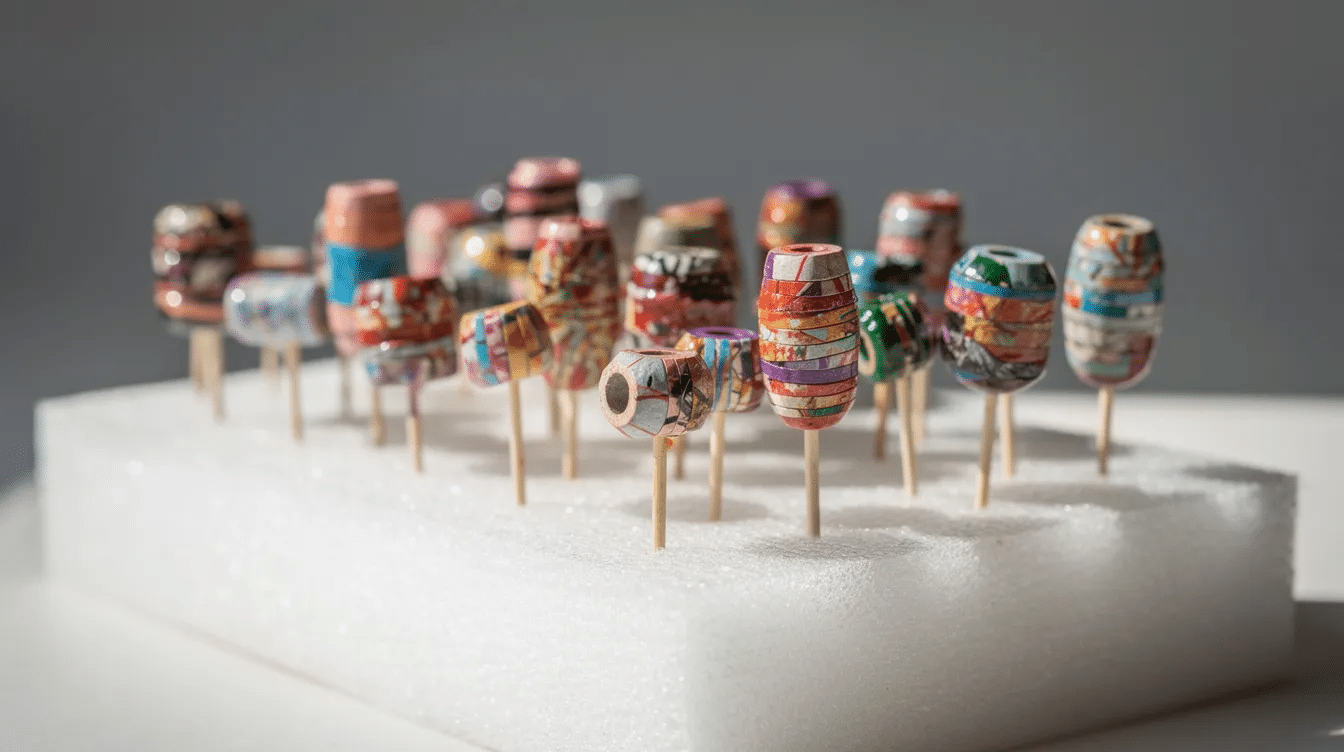
Method 1: Sealing Paper Beads with a Mod Podge Mixture (Dip Technique)
This is the most common home method because it is fast, affordable, and good for sealing a bunch of beads at once. Mod Podge is a popular sealing product for paper beads, often used in a mixture with water at a ratio of approximately 4:1.
- Mix 4 parts Mod Podge Gloss Lustre with 1 part clean water in a wide-mouth bowl. Stir slowly until smooth and bubble-free.
- Hold the two looped ends of your fishing line, dip the beads fully into the mod podge mixture, swirl gently for a few seconds, then pull the line up slowly.
- Let excess podge drip back into the bowl. Wipe or gently squeegee the beads with gloved fingers to remove thick drips.
- Hang the string on the toothpick rungs of the shoe box rack and let the beads dry for 2–3 hours.
- Repeat for a second coat or third coat if you want better gloss and protection.
A common method for sealing paper beads is to use Mod Podge, which can be applied in thin layers, typically requiring 2-3 coats for effective sealing. Applying thin coats of sealant prevents bubbling and ensures a smooth look. After the final coat, let the beads cure for at least 24 hours before using them in bracelets, necklaces, or earrings.
Method 2: Brushing on Mod Podge or Glue (Single‑Bead Control)
Brushing is slower than dipping, but it gives you more control over special focal beads, cone beads, hand paint details, or metallic accents. It also reduces the chance of filling holes with excess glue.
Place each bead on a toothpick and rest the toothpick ends across a cup, bowl, or foam block. Load a fine-bristled paintbrush or sponge brush with a thin layer of Mod Podge, either straight from the bottle or as a 4:1 mix.
- Rotate the toothpick while brushing from hole to hole in long strokes.
- Check the edge and bead ends for pooled glue before drying.
- Move the coated bead, still on the toothpick, into the foam block or shoe box rack.
- Wait at least 1 hour between coats, then repeat until you have 2–3 thin coats.
If you want a harder, shinier result, applying 3 to 4 thin layers of sealant allows for a hard, glossy, water-resistant finish. Just avoid adding half-dry layers too quickly, because trapped moisture can turn cloudy.
Method 3: Spray Sealant and Varnish Dip Options
Clear spray sealants and water-based varnish dips can create a very smooth finish, but they need better ventilation and more careful setup. Clear spray sealants can be used to coat paper beads, allowing for an even finish and quick application.
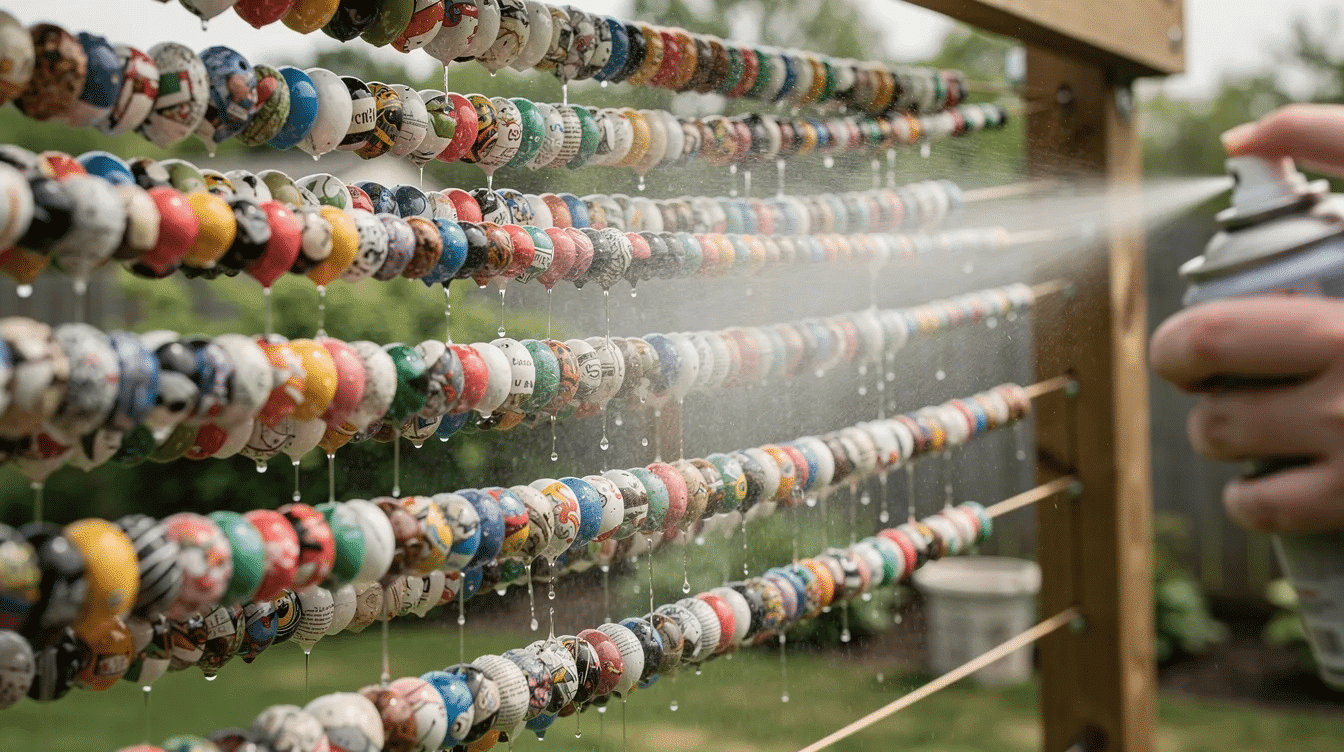
- Another effective sealing method involves using a spray sealant, which can be applied by hanging the beads on a fishing line and spraying them outdoors.
- Hang multiple strings horizontally on bamboo skewers, then rest the skewers between two supports such as chair backs or boxes.
- Shake the spray well and apply light sweeping passes from about 20–30 cm away, rotating the strings until all sides are covered.
- Dipping paper beads in a water-based varnish is also a popular sealing technique, where the beads are submerged and then hung to dry.
- For a varnish dip, thread beads on fishing line with a small weight at the bottom, dip into a jar of water-based craft varnish, lift slowly, let excess drip off, and hang to dry.
With spray sealant and varnish, multiple thin coats are better than one thick coat. Follow the product label, but many varnishes need 2–4 hours between coats. Avoid solvent-heavy construction varnishes for regular craft work; they are usually overkill for paper beads and require stronger safety precautions.
How Waterproof Can Sealed Paper Beads Really Get?
Home sealing makes paper beads highly splash-resistant, not permanently submersible like glass, ceramic, or resin beads. Mod Podge, acrylic spray, and water-based varnish protect against sweat, light rain, and brief moisture, but the paper core can still swell if water gets inside.
To test your method, soak one fully cured sample bead in plain water for 6–8 hours. Look for swelling, softening, cloudiness, or unraveling.
- Mod Podge Dishwasher Safe Sealer can create a stronger water-resistant shell if used correctly and cured for up to 28 days, according to Plaid’s dishwasher-safe guidance.
- Remove paper bead jewelry before showering, swimming, or heavy cleaning.
- If you need truly waterproof pieces, use paper beads as decorative accents and combine them with glass, metal, or resin components in the most exposed areas.
Common Mistakes When Sealing Paper Beads (and How to Avoid Them)
Most problems come from rushing. Sticky beads, cloudy finishes, and stuck strings are usually caused by thick coats, poor drying, or beads touching each other.
- Too much sealant: thick layers trap moisture, stay rubbery, and leave drip marks.
- No drying time: adding a new coat before the previous coat is dry can cause streaks, bubbles, and cloudiness.
- Beads packed too tightly: leave space between each bead on the line.
- No protective liner: drips can bond beads to cardboard, so cover the box bottom with parchment or plastic.
- Rough finish: sand lightly after drying, wipe off dust, and add one thin final coat.
If only one side looks dull, rotate the bead and apply a careful touch-up coat rather than covering the whole bead again.
Curing, Storing, and Using Your Sealed Paper Beads
Dry to the touch does not mean fully cured. Curing is the longer process where the sealant hardens, becomes less tacky, and reaches better durability.
For standard Mod Podge or acrylic varnish, wait at least 24 hours before stringing beads into jewelry. For maximum hardness, allow several days to a week. Dishwasher-safe formulas may need 21–28 days before heavy moisture exposure.
- Store finished beads loosely in compartment boxes or resealable bags.
- Avoid hot places such as car dashboards, where sealant can soften.
- Clear clogged holes with a thin needle, awl, or stiff wire after curing.
- Use sealed paper beads in bracelets, necklaces, keychains, and earrings.
- Pair them with glass seed beads, metal spacers, or waxed cotton cord for a more durable design.
I hope this gives you a simple, repeatable process for sealing paper beads at home without making the project complicated.
FAQ
How many coats of Mod Podge do I need on each paper bead?
For most projects, 2–3 thin coats of Mod Podge or a 4:1 Mod Podge mixture are enough. One coat is usually too fragile for jewelry, while more than 4 coats can look plasticky or cloudy.
Can I use regular white glue instead of Mod Podge to seal paper beads?
Yes, thinned white PVA glue can work as a budget sealer, but it may dry less clear and less glossy than Mod Podge. For better shine, add a final coat of clear acrylic spray or brush-on varnish.
Why do my sealed paper beads feel sticky even after a day?
Tackiness usually means the coats were too thick, the room was humid, or the product has not cured fully. Move the beads to a warmer, drier room and give them several more days before storing.
Is there a way to keep the holes in my paper beads from sealing shut?
Seal beads while they are on toothpicks, skewers, fishing line, or wire so something occupies the holes while the finish is wet. If a hole narrows, reopen it gently with an awl, thin nail, or stiff wire once fully dry.
Are sealed paper beads suitable for children’s jewelry?
Yes, if you use non-toxic, water-based products labelled for craft use and allow the beads to cure completely. Avoid very small beads for young children because they can be a choking risk.



