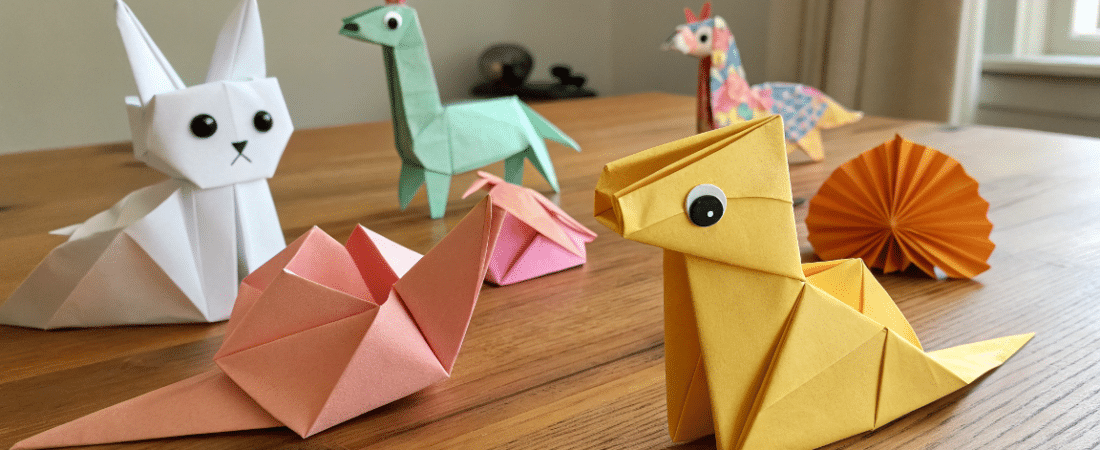
Cute crafts paper is a fun way to get creative with your child through family-oriented craft projects. A fun thing to do is engage children in crafting activities that are both entertaining and educational. With just a few supplies, you can make adorable projects that brighten any space. Whether it’s a rainy day or you just want to try something new, these ideas will keep your hands busy and your imagination alive. From paper flowers to colorful chains, there’s something for everyone. Creating paper flowers can be a fun way to decorate without using real flowers. Let’s dive into these cute crafts paper projects that are perfect for all ages. Get ready to fold, cut, and glue your way to fun!
Key Points:
- Introduction to Cute Crafts: Discover fun paper crafts and projects that let you express creativity and brighten your space using simple materials like paper, glue, and scissors.
- Creating Paper Flowers: Use patterned or colorful paper, fold and shape petals, and glue them together to create vibrant, decorative paper flowers suitable for various settings.
- Making a Paper Wreath: Cut construction paper into leaves, arrange in a circle, and secure with hot glue, then personalize with yarn or ribbons for seasonal or decorative purposes.
- Fun Crafts with Paper Chain: Create colorful paper chains from wrapping paper strips, loop and glue them, and use them to decorate rooms or for festive occasions, involving children in the fun.
- Eco-Friendly Paper Crafting: Use recycled and sustainable materials like old maps, book pages, and natural fibers to create environmentally conscious and unique paper crafts.
- Introduction to Cute Crafts
- 1. Paper Flowers
- 2. Paper Wreath
- 3. Paper Chain Garland
- 4. Origami Butterflies
- 5. Paper Snowflakes
- 6. Paper Bears
- 7. Paper Picture Frames
- 8. Paper Magic Box
- 9. Paper Yarn Craft
- 10. Paper Room Decor
- Paper Crafts Basics
- Creating Paper Flowers
- Making a Paper Wreath
- Using Wrapping Paper in Crafts
- Fun Crafts with Paper Chain
- Easy and Fun Crafts for Kids
- Advanced Paper Craft Techniques
- Paper Craft Tools and Materials
- Eco-Friendly Paper Crafting
- Displaying and Sharing Your Paper Craft
- Tips for Making Your Crafts More Engaging
- Common Mistakes to Avoid in Paper Crafting
- Conclusion and Final Thoughts
- FAQ's
Introduction to Cute Crafts
- Discover fun paper crafts and cute projects that allow you to express yourself creatively and add magic to your life.
- Try different paper craft ideas like paper flowers, paper wreaths, and paper chains to achieve the intended decorative effect in your room. You can create paper flowers by downloading and printing a flower template, cutting out the pieces, and gluing the petals together.
- Get creative with construction paper, glue, and scissors for happy crafting every day.
1. Paper Flowers
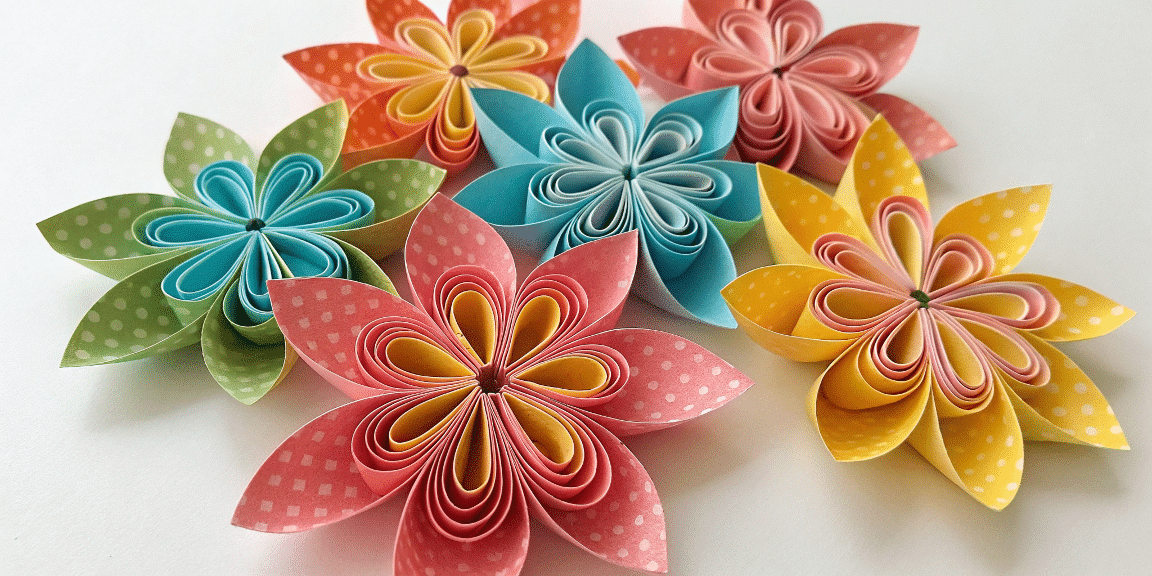
- Use patterned paper or the appropriate material for a vibrant look.
- Fold and shape petals. Kids can use colored pencils to decorate the petals, adding a personal touch to their creations.
- Glue petals together to form a flower. Rolled paper flowers can also be created by cutting and curling strips of paper, adding a unique decorative touch.
2. Paper Wreath
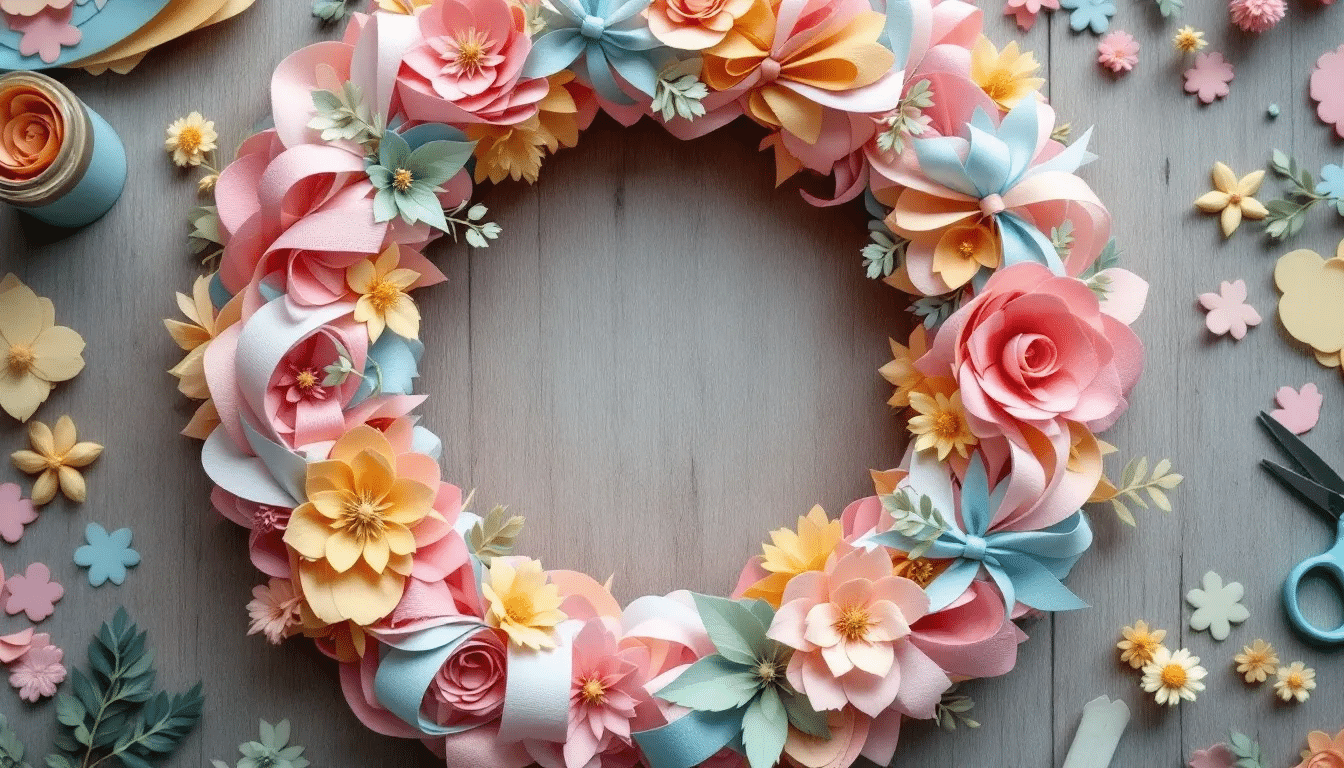
- Cut construction paper into leaves.
- Arrange in a circle.
- Press the leaves together and secure with hot glue.
3. Paper Chain Garland

- Cut strips of wrapping paper to engage your kid in a creative project.
- Loop and glue to create chains. This activity is super fun and will captivate your kid’s interest.
- Hang them up for a festive look. Creating paper garlands involves cutting paper into strips and gluing them together to form decorative shapes, making it a versatile craft for any occasion.
4. Origami Butterflies
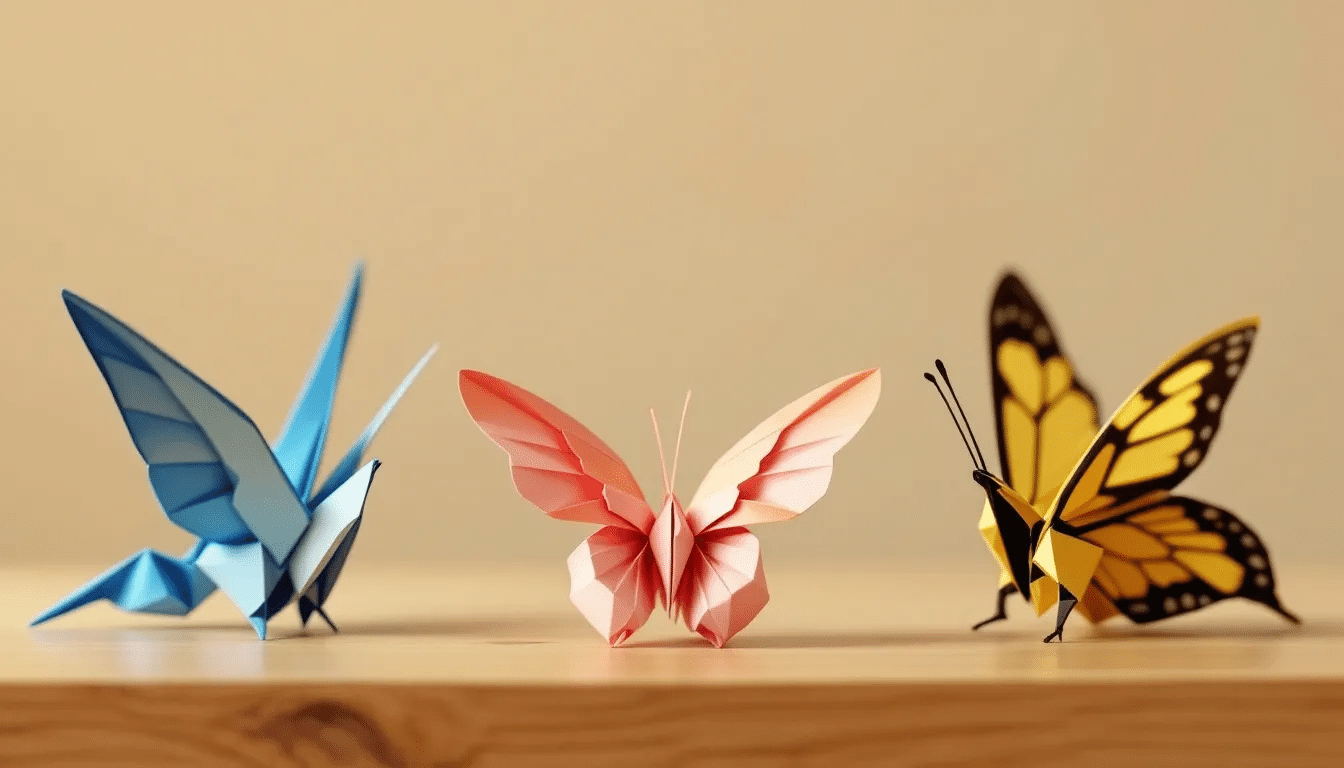
- Follow a printable template.
- Fold carefully to achieve the intended visual effect with the wings.
- Use glitter for a magical touch.
5. Paper Snowflakes
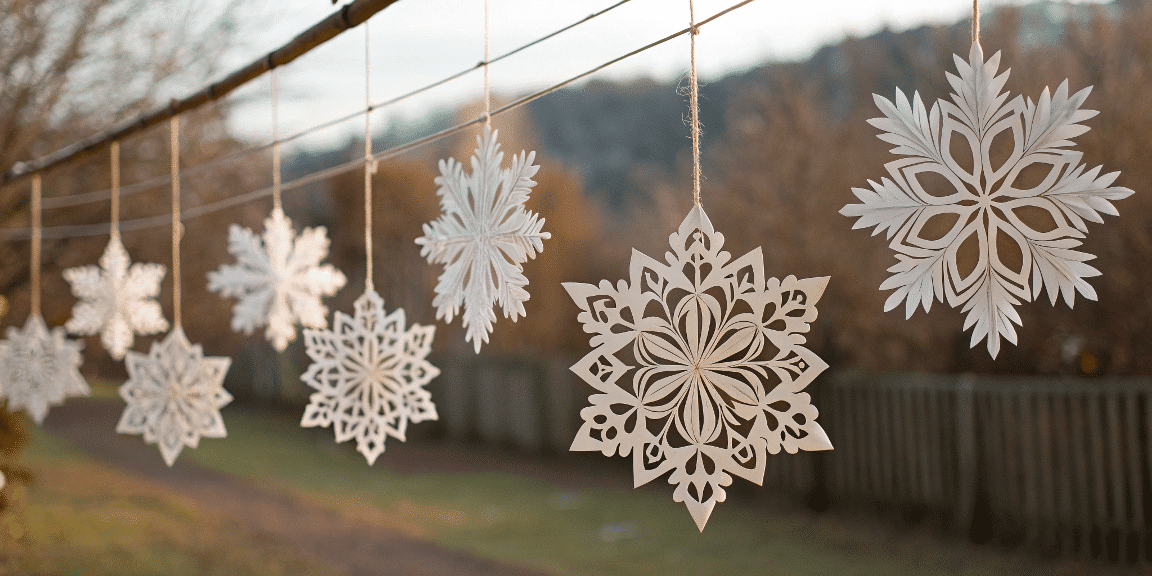
- Fold paper into a triangle.
- Cut small shapes.
- Create small holes in the snowflakes for a delicate design.
- Unfold to reveal your design.
6. Paper Bears
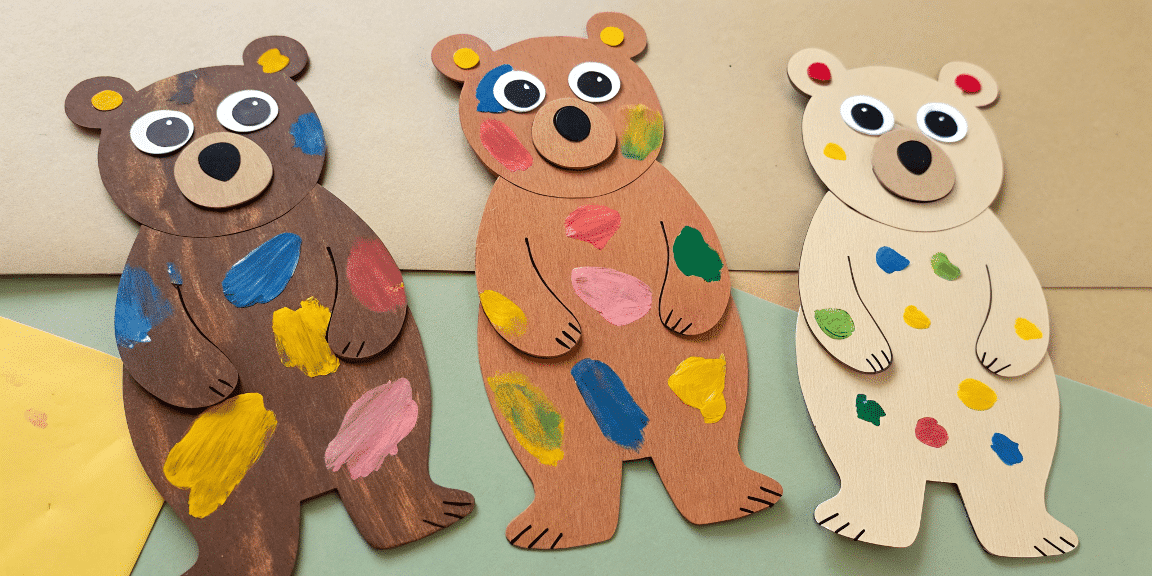
- Draw bear shapes on construction paper to engage your child in a fun and creative activity.
- Cut and decorate with paint.
- Glue on a googly eye for fun. Toilet roll creatures allow kids to express their creativity through imaginative designs, making crafting even more enjoyable.
7. Paper Picture Frames
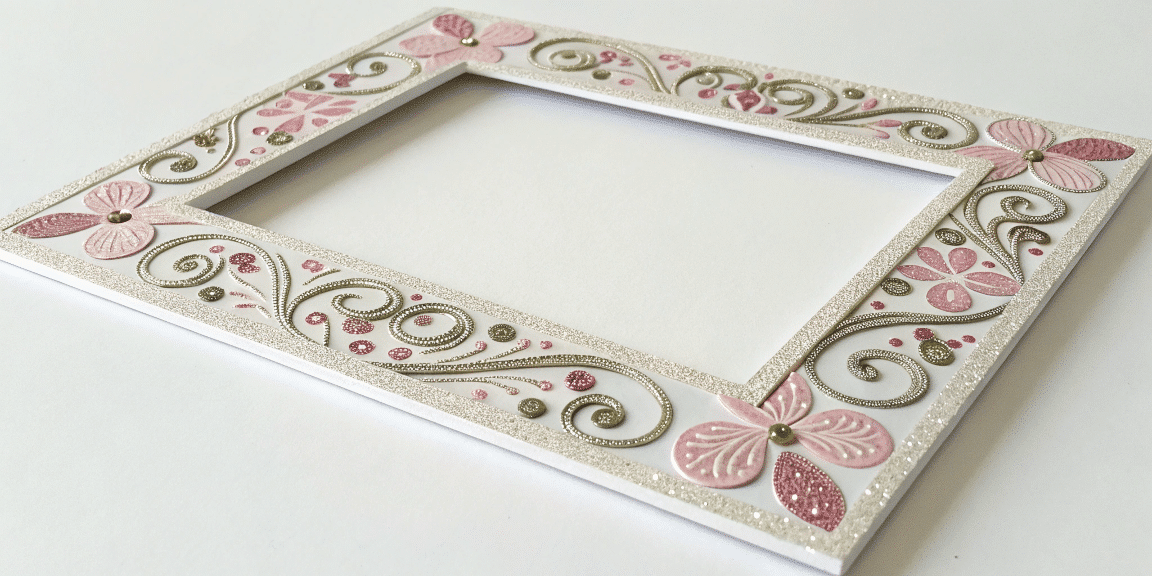
- Cut a frame shape.
- Decorate with glitter and patterns.
- Insert your favorite photo to preserve cherished memories.
8. Paper Magic Box
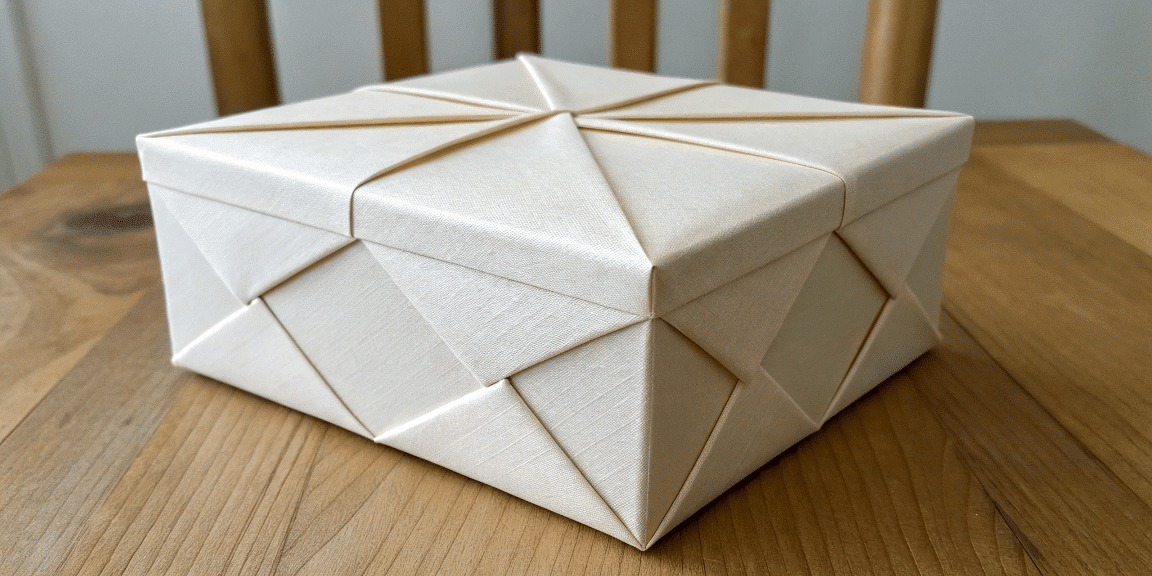
- Follow a video tutorial.
- Learn how to fold and tuck. Make sure to press the folds firmly to create the hidden compartment.
- Surprise with a hidden compartment.
9. Paper Yarn Craft
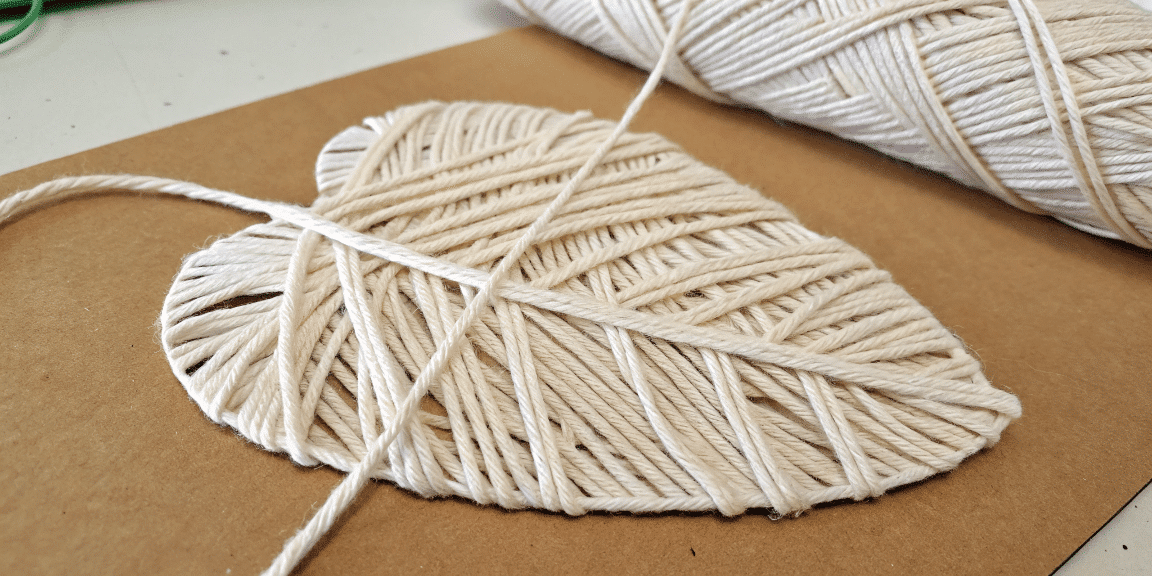
- Select the appropriate material, such as cardstock, for the paper shape.
- Wrap yarn around the paper shape.
- Secure with glue.
- Create a textured look.
10. Paper Room Decor
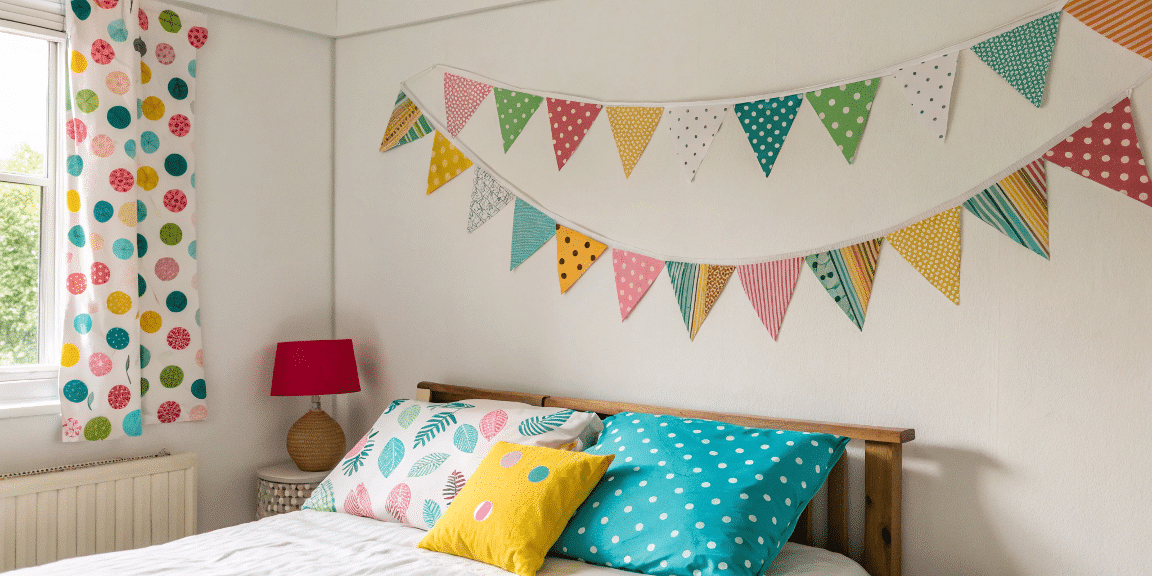
- Cut shapes to hang on the wall.
- Use colorful paper for a pop.
- Arrange in a fun pattern.
Paper Crafts Basics
- Learn the basics of paper crafting to engage your child in fun and educational activities. Start by practicing simple techniques like folding, cutting, and gluing. These skills will help you make beautiful paper art. As you gain confidence, you can explore more complex techniques such as quilling, embossing, and die-cutting, which add intricate details to your projects.
- Understand the different types of paper you can use. Patterned paper and wrapping paper are great choices for adding color and design to your crafts. Additionally, consider using specialty papers like vellum, cardstock, and origami paper to enhance the texture and appeal of your creations. Origami is a traditional Japanese art form that involves folding paper to create intricate designs and shapes.
- Develop your skills with fun projects that keep your child interested in crafting. Use basic materials like paper, glue, and scissors to create exciting crafts at home. Challenge yourself with projects like paper sculptures, pop-up cards, and shadow boxes to expand your crafting repertoire and showcase your artistic talents.
- Explore creative ideas with paper crafts. Try making paper flowers, paper chains, or even a paper wreath to decorate your space. Get inspired by nature and craft paper butterflies, leaves, or even a delicate paper mobile to bring a touch of the outdoors inside.
- Enjoy crafting with friends or family. Share your creations and have fun experimenting with new designs and techniques. Host a crafting party or join a local craft group to exchange ideas, learn new skills, and enjoy the camaraderie of fellow paper craft enthusiasts.
Creating Paper Flowers
Create stunning paper flowers using printable templates and hot glue to add a touch of elegance to your space. When selecting the material, consider using the appropriate type of paper, such as cardstock, to ensure the best results. These flowers can be customized with different colors and patterns to match any decor style. Consider using patterned paper for a vibrant look or opt for a more classic approach with solid colors. The versatility of paper flowers makes them an excellent choice for both temporary decorations and long-lasting displays.
Learn various folding techniques to make beautiful flowers that can be used to decorate your front door or room. Experiment with different petal shapes and sizes to create unique floral arrangements. You can also incorporate other materials, such as yarn or beads, to add texture and interest to your designs. Paper flowers are not only a fun craft project but also a creative way to personalize your living space.
Add some glitter and creativity to your paper flowers to make them truly unique and special. By incorporating glitter, you can create a sparkling effect that catches the light and adds a magical touch to your creations. Don’t be afraid to get creative with your designs—try combining different types of paper or adding embellishments like sequins or rhinestones. The possibilities are endless, and each flower you create will be a testament to your artistic flair.
Making a Paper Wreath
- Make a beautiful paper wreath using wrapping paper, construction paper, or patterned paper to hang on your wall or door. This project is perfect for adding a touch of seasonal charm to your home, whether you’re celebrating a holiday or simply want to refresh your decor. Consider using different colors and patterns to match the theme of your room or the mood of the season.
- Learn how to use hot glue and scissors to create a stunning wreath that can be customized with different shapes and patterns. Press the shapes together to secure them with hot glue. You can experiment with various leaf shapes, flowers, or even geometric designs to give your wreath a unique flair. Accordion folded paper wreaths can be made by layering medallions together for added depth and texture.
- Add some yarn or string to your wreath to give it a more rustic and creative look. Wrapping yarn around sections of your wreath can introduce a cozy texture, making it perfect for fall or winter decorations. You can also weave in ribbons or lace for a more elegant finish, allowing your wreath to stand out as a centerpiece on your front door or wall.
Using Wrapping Paper in Crafts
Explore the various ways to use wrapping paper in your crafts, including making paper flowers, paper chains, and paper wreaths. Selecting the appropriate material, such as the type of wrapping paper, is crucial for achieving the best results in your crafting projects. Wrapping paper is not only versatile but also comes in a wide array of colors and patterns, making it perfect for adding a personal touch to your crafts. You can experiment with different styles, whether you’re aiming for a chic and elegant look or something more playful and vibrant. A paper ball garland can be made by cutting paper into strips, gluing them together, and stringing them up for a festive decoration. The flexibility of wrapping paper allows you to create intricate designs or simple decorations that can transform any space.
Learn how to wrap and cover objects with wrapping paper to create unique and interesting shapes. This technique is ideal for upcycling old items or giving new life to plain objects. By covering boxes, frames, or even furniture with wrapping paper, you can create a cohesive and stylish look that reflects your personality. Additionally, wrapping paper can be used to make custom gift wraps, adding a personal touch to your presents and making them stand out.
Discover the different patterns and designs available in wrapping paper to add some creativity to your crafts. From floral motifs and geometric patterns to seasonal themes and abstract designs, the options are endless. Incorporating these patterns into your projects can enhance the visual appeal and make your creations more engaging. Mix and match different designs to create a dynamic and eye-catching display that showcases your artistic skills. Don’t forget to explore specialty wrapping papers, such as metallic or textured varieties, to add an extra layer of interest to your crafts.
Fun Crafts with Paper Chain
- Create a fun and colorful paper chain using construction paper and glue to decorate your room or wall. Paper chains are a classic craft that can be customized to suit any theme or occasion. Choose colors that match your decor or go for a rainbow effect to brighten up any space. These chains are not only easy to make but also provide a great way to involve kids in crafting, making it a perfect family activity. This activity is super fun for kids, keeping them engaged and excited as they create their own designs.
- Learn how to make paper chains in different lengths and patterns to add some creativity to your space. Experiment with varying strip sizes and patterns to create unique designs. You can incorporate themed elements, such as holiday motifs or seasonal colors, to make your paper chains more festive. Additionally, consider adding embellishments like glitter or stickers to enhance the visual appeal of your chains.
- Use paper chains to create a beautiful garland or decoration for special occasions. They are ideal for parties, weddings, or any celebration where you want to add a touch of handmade charm. Hang them across doorways, along walls, or even drape them over tables to create an inviting atmosphere. For a more personalized touch, you can write messages or names on the links, turning your paper chain into a meaningful keepsake.
Easy and Fun Crafts for Kids
Find easy and fun crafts for kids that incorporate play into crafting activities using simple materials like paper, glue, and scissors. These projects are perfect for sparking creativity and imagination in young minds, allowing them to explore their artistic talents while having a great time. From simple shapes to more intricate designs, there’s a wide variety of crafts to suit different skill levels and interests. We hope that kids find these crafts engaging and enjoyable, sparking their interest and creativity.
Learn how to make cute crafts, such as paper butterflies, snowflakes, and bears, that can be customized with different colors and patterns. Encourage kids to experiment with various color combinations and decorations, such as adding glitter or stickers, to make each creation unique. Paper chain snakes can be made by alternating top and tummy components with side pieces while coloring and gluing them together. These crafts not only provide a fun activity but also help develop fine motor skills and enhance hand-eye coordination.
Discover the various videos and tutorials available on YouTube to help kids learn and develop their crafting skills. With step-by-step guidance, kids can easily follow along and create their own masterpieces. These resources offer a wealth of ideas and techniques, from basic folding and cutting to more advanced projects, ensuring that young crafters can continue to challenge themselves and grow their skills. Additionally, engaging with online content can inspire kids to come up with their own creative ideas and share them with friends and family.
Advanced Paper Craft Techniques
Dive into the world of advanced paper crafts and discover techniques that elevate your projects to new heights. These methods allow you to create intricate and complex designs, adding a touch of sophistication to your crafts. Making paper beads involves cutting long triangles from paper, rolling them tightly, and securing them with glue to make jewelry. This technique is perfect for creating unique accessories or embellishments for other projects.
One popular advanced technique is quilling, which involves rolling and shaping narrow strips of paper into beautiful, intricate designs. This method can be used to create stunning 3D paper flowers, delicate snowflakes, or even detailed portraits. The precision and patience required for quilling make it a rewarding challenge for any paper craft enthusiast.
Another fascinating technique is paper piercing, where you use a needle or piercing tool to create intricate patterns and designs. This method adds a unique texture and dimension to your paper crafts, making them stand out. Imagine creating a beautiful paper wreath with delicate pierced patterns that catch the light and add a touch of elegance to your front door.
Advanced paper craft techniques also include paper mache and decoupage, which allow you to create complex and detailed designs. Paper mache involves layering paper and adhesive to form sturdy, sculptural pieces, while decoupage uses cut-out images and patterns to decorate surfaces. Both techniques offer endless possibilities for creating unique home decor items, such as vases, bowls, and picture frames.
Adding glitter, beads, and other embellishments can further enhance your advanced paper crafts. These elements add texture and interest, making your projects truly one-of-a-kind. Whether you’re creating a layered paper flower or a detailed cut-out design, these advanced techniques will help you achieve stunning results that you can proudly display on your wall or in a frame.
Paper Craft Tools and Materials
To create beautiful and intricate paper crafts, having the right tools and materials is essential. Here’s a comprehensive list of must-have items for any paper craft enthusiast:
- Scissors: A good pair of scissors is crucial for precise cutting. Consider having both regular and fine-tip scissors for different types of cuts.
- Glue: Various adhesives, such as glue sticks, hot glue, and spray adhesive, are essential for attaching paper and other materials. Hot glue is particularly useful for more robust projects.
- Paper: Experiment with different types of paper, including construction paper, patterned paper, and wrapping paper. Each type offers unique textures and colors that can enhance your designs.
- Craft Knives: For detailed and intricate cuts, a craft knife is indispensable. Ensure you have a cutting mat to protect your work surface.
- Piercing Tools: These tools are perfect for creating intricate patterns and designs through paper piercing techniques.
- Embellishments: Add interest and texture to your projects with glitter, beads, stickers, and other decorative elements.
- Yarn and String: These materials can be used to add texture and dimension to your paper crafts, such as wrapping around shapes or creating intricate designs.
- Templates and Stencils: Use these tools to create uniform and precise designs, making your crafting process more efficient.
- Adhesives: Besides glue, consider using tape and other adhesives for different applications. Each type has its own strengths and is suitable for various projects.
- Specialty Tools: Tools like embossing folders, quilling tools, and die-cut machines can add intricate details and elevate your paper crafts to a professional level.
With these tools and materials, you’ll be well-equipped to tackle a wide range of paper crafts, from simple cards and gift tags to complex and intricate designs. Happy crafting!
Eco-Friendly Paper Crafting
Embrace sustainability with eco-friendly paper crafting, which involves using recycled and sustainable materials to create beautiful projects. This approach not only reduces waste but also adds a unique touch to your crafts.
Start by using recycled paper, such as old maps, book pages, and music sheets, to create unique and interesting designs. These materials add a vintage charm and tell a story through your crafts. For example, you can create a stunning paper flower bouquet using pages from an old novel, adding a literary twist to your decor.
Incorporate sustainable fibers like bamboo and hemp into your projects. These materials are not only eco-friendly but also offer different textures and strengths, making your crafts more diverse and interesting. Natural dyes and pigments, such as plant-based inks and paints, can add vibrant colors to your designs without harming the environment.
Eco-friendly paper crafting also involves minimizing waste. Use reusable materials like stencils and templates to create uniform designs without excess paper. Opt for energy-efficient tools, such as solar-powered scissors, and eco-friendly adhesives to further reduce your environmental impact.
Consider creating functional and useful items, such as notebooks, journals, and gift boxes, with your eco-friendly paper crafts. These items not only serve a purpose but also showcase your commitment to sustainability. Packaging your crafts in biodegradable bags and boxes ensures that every aspect of your project is environmentally conscious.
By adopting eco-friendly paper crafting techniques, such as upcycling and repurposing, you can create unique and interesting designs while reducing waste and minimizing your environmental footprint. Happy crafting!
Displaying and Sharing Your Paper Craft
Learn how to display and share your paper craft with others, including framing and hanging your artwork. You can even use your paper crafts to decorate a sign, adding a personal touch to your decorations. Framing your paper crafts not only preserves them but also adds a professional touch, making them suitable for display in any room. Consider using shadow boxes for three-dimensional projects or creating a gallery wall with a collection of your best pieces. Hanging your artwork can transform a blank wall into a vibrant showcase of your creativity, inviting admiration from guests.
Discover the different ways to showcase your crafts, such as creating a craft box or album. A craft box can serve as a treasure chest of your creative journey, where you can store and organize your projects by theme or occasion. Creating an album allows you to document your progress and reflect on your artistic growth. You can personalize your album with decorative paper, stickers, and captions to enhance the storytelling aspect of your crafting adventure.
Share your creativity with others and get feedback and inspiration to continue developing your skills. Participate in local craft fairs, join online crafting communities, or start a blog to share your work with a broader audience. Engaging with other crafters can provide valuable feedback and spark new ideas, helping you refine your techniques and expand your repertoire. By sharing your creativity, you also inspire others to explore the world of paper crafts, fostering a community of like-minded individuals who appreciate the art of crafting.
Tips for Making Your Crafts More Engaging
- Get tips and ideas on how to make your crafts more engaging and interesting, including adding glitter, colors, and patterns. Enhancing your crafts with vibrant colors and textures can elevate their visual appeal and captivate attention. Experiment with different color schemes and patterns to create dynamic and eye-catching designs that reflect your personal style. Allowing kids to express themselves creatively can make the crafting process even more enjoyable and engaging.
- Learn how to use different materials and techniques to create unique and stunning designs. Incorporating materials like yarn, beads, or metallic papers can add depth and interest to your projects. Try experimenting with techniques such as embossing, quilling, or layering to add intricate details and dimension to your crafts, making them stand out.
- Discover how to make your crafts more interactive and fun, such as creating a puzzle or game. Transform your paper crafts into interactive experiences by designing puzzles or games that engage both the creator and the viewer. Consider making pop-up cards, paper mazes, or 3D models that invite interaction and exploration. These projects not only provide entertainment but also offer a unique way to showcase your creativity and craftsmanship.
- Explore ways to personalize your crafts by incorporating elements like photos, handwritten notes, or custom designs. Adding a personal touch can make your creations more meaningful and memorable. Use photos to create scrapbook pages or personalized frames, and include handwritten notes or messages to add a heartfelt element to your crafts.
- Consider the use of multimedia elements to enhance your paper crafts. Integrate digital components, such as QR codes that lead to a video tutorial or a digital message, to create an interactive experience. This blend of traditional crafting with modern technology can offer a fresh perspective and broaden the scope of your creative projects.
Common Mistakes to Avoid in Paper Crafting
- Using the Wrong Materials: Choosing the incorrect type of paper or adhesive can lead to disappointing results. Always select the right materials for your specific project, such as construction paper for durability or patterned paper for design. The type of material, like cardstock, is crucial as it affects the scoring tools required for cutting and the overall outcome of your 3D stars.
- Ignoring Measurements: Not measuring accurately can result in uneven cuts and misaligned pieces. Take the time to measure carefully and use tools like rulers or templates for precision.
- Overusing Glue: Applying too much glue can cause paper to wrinkle or tear. Use a small amount and spread it evenly to avoid excess. Consider using hot glue for more robust projects that require a stronger hold.
- Rushing the Process: Crafting is a creative journey, and rushing can lead to mistakes. Take your time to ensure each step is completed correctly, allowing you to enjoy the process and achieve the best results.
- Skipping Instructions: Whether following a video tutorial or a printable template, skipping steps can lead to confusion and errors. Follow instructions closely to ensure a successful outcome.
- Neglecting to Plan: Jumping into a project without a clear plan can lead to wasted materials and time. Sketch out your design or gather all necessary supplies before starting to stay organized.
Conclusion and Final Thoughts
Paper crafts are a fun and easy way to engage your child in expressing their creativity. With just a few supplies, like paper, glue, and scissors, you can make beautiful projects. Whether you’re making paper flowers, a wreath, or a chain, these crafts are perfect for all ages. Remember to enjoy the process and don’t worry about making mistakes. Happy crafting!
FAQ’s
What are some advanced techniques in paper crafting?
Advanced paper crafting techniques include quilling, paper piercing, paper mache, decoupage, and making detailed paper beads, which require more skill and add intricacy to your projects.
How can I make eco-friendly paper crafts?
Eco-friendly paper crafts can be made using recycled materials like old maps, book pages, or natural fibers, and by minimizing waste, reusing templates, and opting for sustainable adhesives and inks.
What tools are essential for effective paper crafting?
Essential tools for paper crafting include sharp scissors, glue or adhesive, craft knives, templates or stencils, and embellishments such as beads or glitter to add detail and interest.
How can I personalize my paper craft projects?
You can personalize your paper crafts by using different colors and patterns, adding embellishments like glitter or stickers, incorporating photos or handwritten notes, and experimenting with various materials and techniques.
What are some popular simple paper crafts for beginners?
Popular simple paper crafts for beginners include making paper flowers, paper snowflakes, and paper chains, as they involve basic techniques like folding, cutting, and gluing.
