

Making paper squishies is a fun and simple way to spend your free time. Paper squishies ideas can help you come up with cool designs that are easy to make at home, especially when exploring diy paper squishies. All you need is paper, tape, scissors, and some markers. You don’t have to be an art expert to enjoy this. It’s perfect for anyone who likes to doodle or make stuff with their hands. From cute animals to tasty snacks, there’s no limit to what you can create. There are many cute paper squishy ideas for inspiration, so you’ll always have something new to try. I’ll share fun, easy, and cool ideas that you can try right away. Let’s keep it real and keep it simple. Grab your paper and let’s get started. These ideas will bring your creative projects to life. You’ll never run out of paper squishies ideas again.
Introduction to DIY Paper Crafts
DIY paper squishies are a blast to make. You get to draw, cut, and build something that’s soft and squeezable. No fancy stuff needed—just your hands and a few things from around the house. DIY Paper Squishies are easy to make and surprisingly satisfying to squish and play with. To make a paper squishy, you’ll need paper, markers, tape, and stuffing materials like cotton or foam. Let’s start with easy and fun designs you can try.
For step-by-step instructions, you can follow a paper squishy tutorial, which often includes printable templates and material recommendations to help you create your own paper squishies.
Benefits of Making Paper Squishies
Making paper squishies is fun. It’s more than just fun. It comes with benefits. Awesome benefits. These DIY projects work for stress relief. They help you relax. They help you refocus. After a busy day? Perfect. Feeling bored? Work on a new paper squishy idea. It sparks creativity. It gives you accomplishment. Real accomplishment. You express yourself through designs. Food paper squishies work. Your own characters work too.
Crafting paper squishies improves skills. Fine motor skills get better. Concentration gets better. Try new squishy ideas. Follow online videos. Your skills improve each time. Notice the difference. The best part? Paper is affordable. Super affordable. Enjoy this hobby without spending much. So many options exist. You won’t run out of inspiration. Ever. Tap into your imagination. Keep practicing. Watch your creations improve. Over time.
Paper Squishies Ideas and Methods Chart ( Quick View)
Paper Squishy Idea | Method |
|---|---|
Mini Milk Cartons | Draw a small milk box shape on two papers, add a cute face with markers, color with bright pens, cut out both shapes, tape edges leaving a small hole, stuff with cotton or tissue, then seal. |
Happy Hamburgers | Stack circles for buns, add red and green colors for tomato and lettuce, draw a smiley face, cut two identical shapes, tape edges leaving a hole, stuff lightly, and tape shut. |
Sleepy Pandas | Use an oval shape for the head on two sheets of white paper, add big black eyes and a small nose with markers, cut out, tape edges leaving a hole, stuff, and seal. |
Rainbow Popsicles | Draw a rectangle with a rounded top, color rainbow stripes, add a stick at the bottom, cut two identical shapes, tape leaving a hole, stuff, and close. |
Donuts with Sprinkles | Cut two circles with a hole in the middle, color pink frosting, add dots for sprinkles, tape edges leaving a small hole, stuff lightly, and tape shut. |
Designing Your Paper Squishy
Want to make your squishy pop with amazing details? Start with a fun idea. Here are a few that always work: Make more complex squishies like a 3D blueberry pie or a grape soda can.
- Create realistic textures with colored paper cut-outs and careful shading to mimic real objects.
- Choose a cute animal, food, or character as your base.
- Use bright colors and bold outlines to make your design stand out.
- Pay attention to details like facial expressions and additional decorations to give your squishy personality and charm.
1. Mini Milk Cartons

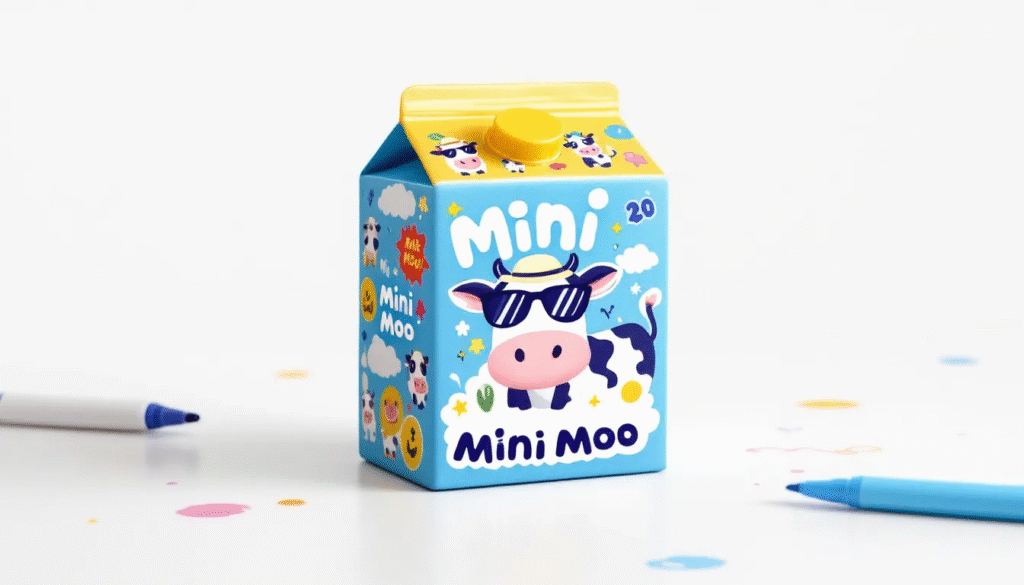
- Draw a small milk box
- Add a cute face
- Color it with bright markers
- Pay attention to details like facial expressions and additional decorations to make your squishy more engaging.
2. Happy Hamburgers


- Stack circles for buns
- Add red for tomato and green for lettuce
- Don’t forget a smiley face
- Pay attention to details like facial expressions and additional decorations to make your squishy more engaging.
3. Sleepy Pandas
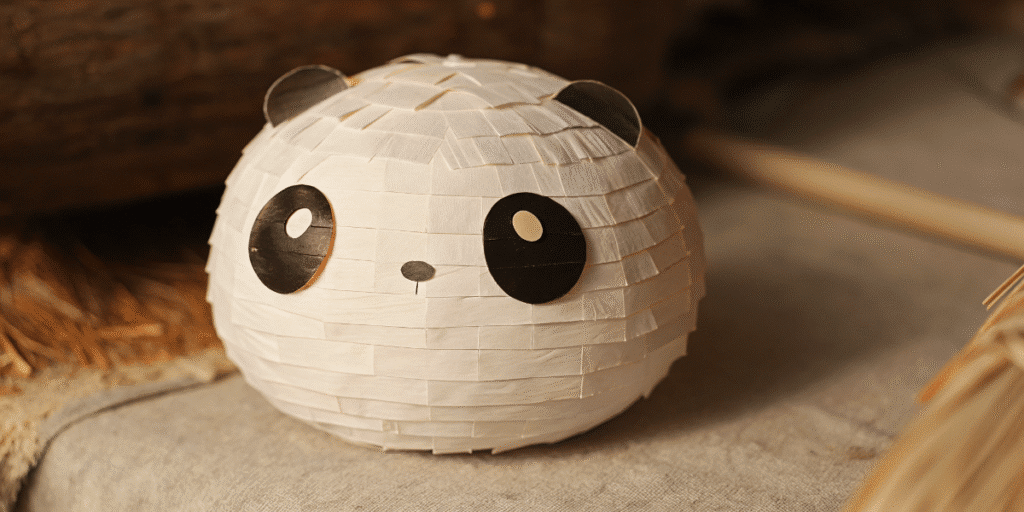
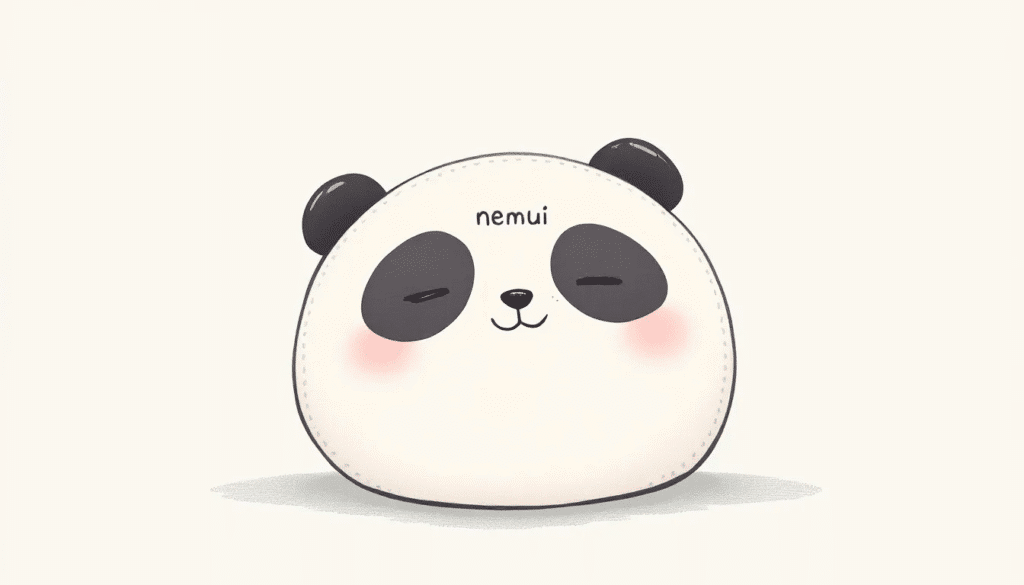
- Oval shape for the head
- Big black eyes and a little nose
- Use white paper to keep it simple
- Pay attention to details like facial expressions and additional decorations to make your squishy more engaging.
4. Rainbow Popsicles

- Rectangle with round top
- Color in rainbow stripes
- Add a stick at the bottom
- Pay attention to details like facial expressions and additional decorations to make your squishy more engaging.
5. Donuts with Sprinkles
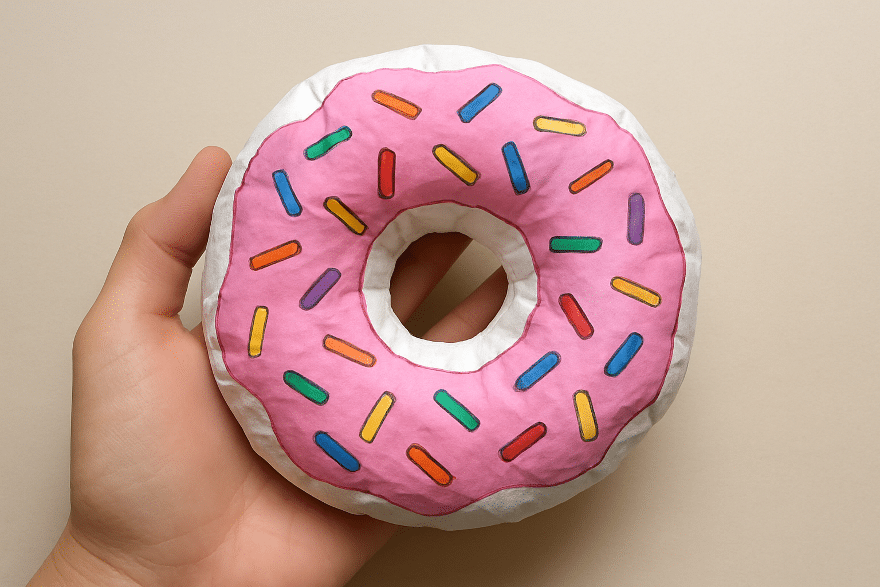

- Circle with a hole in the middle
- Color in pink frosting
- Use dots for sprinkles
Want more ideas? Try:
- S’mores
- Avocados
- Stars
- Clouds
- Ice cream cones
Make it yours. Add glitter, stickers, or even googly eyes. Pay attention to the details, such as facial expressions and additional decorations, to make your squishy more engaging.
Working with DIY Paper
Experience the joy of creating your own paper squishy:
Here’s how to build your paper squishy:
- Draw your favorite character or shape on a piece of paper.
- Cut out two identical shapes.
- Tape the edges together, leaving a small opening.
- Stuff the inside with cotton, tissue, or memory foam for different textures.
- Seal the opening with tape.
Alternative stuffing ideas: Try using sponge pieces, fiberfill, or even plastic bags for unique feels. For a satisfying slow-rise effect, use memory foam or layers of tissue paper instead of standard cotton stuffing.
Tip: Leaving little air gaps inside your squishy can create a slow rising effect when you squish it, making it even more satisfying to play with.
Best Paper Types
- Cardstock: strong and thick
- Construction paper: colorful and soft
- Printer paper: works fine too
Tools You’ll Need
- Scissors
- Clear tape
- Markers or colored pens
- Tissue or cotton for stuffing
How to Shape It
- Cut out two of the same shape
- Tape the edges but leave a small hole
- Stuff it with tissue or cotton
- Tape it shut
- Done! Using two identical shapes back to back is key to making your Paper Squishy. Taping skills can affect the functionality of the Paper Squishy, as gaps can prevent proper squishing.
You can also try these ideas:
- Bubble wrap inside for extra squish
- Foam bits if you have them
- Ziploc bag pieces for a crinkly sound
- Little air gaps in the squishy can create a slow rising effect when squished.
Bringing Your Paper Squishy to Life
Now it’s time to bring your creation to life.
Steps to Follow:
- Draw your design on two sheets
- Cut them out
- Line them up
- Tape all edges but one
- Add stuffing
- Tape it shut
- Squeeze and smile
Want to see it done? Check out YouTube for “how to make a paper squishy.” There are tons of videos that show every step.
You can even:
- Make a whole collection
- Trade with friends
- Give them as gifts
Exploring More Paper Squishies Ideas
Running low on paper squishy ideas?
Try one of these fun themes:
If you’re working with kids, involving them in crafting can also enhance their fine motor skills.
1. Animals

- Cats
- Sloths
- Llamas
- Fish
- Dinosaurs
2. Foods
- Watermelon
- French fries
- Cupcakes
- Bubble tea
- Macarons
3. Stuff from School
- Books
- Backpacks
- Pencil cases
- Erasers
4. Emojis
- Laughing face
- Heart eyes
- Crying face
- Winking face
These are fun to draw and even more fun to squish.
Mix and match to make something new.
Try weird combos too—like a cat-donut or a taco-unicorn.
Working with kids?
Let them color their own.
It’s fun and helps with focus and creativity. Involving kids in crafting can also enhance their fine motor skills. Crafting with kids can provide opportunities for teaching concepts of measurement and design.
Creating a Unique Paper Squishy
Squishy DIY projects are a great way to make your paper squishies stand out.
Want yours to stand out? Make it one-of-a-kind. Here’s how:
- Pick a theme: like space, animals, or fantasy
- Use different shapes: round, square, even triangle
- Add layers: tape on extra ears, tails, or wings
- Try cool textures: bubble wrap or foil
Special Ideas:
- Cartoon characters
- Holiday squishies (pumpkins, hearts, stars)
- Your pet in squishy form
- Your favorite snack as a squishy
Mix colors.
Add patterns.
Use glitter if you want sparkle.
Try making:
- Glow-in-the-dark squishies
- See-through squishies with plastic windows
- Flip squishies with two faces
Watch, Learn, Repeat
Need help? Look it up on YouTube. There are video tutorials for:
- Fast tutorials
- Step-by-step guides
- Ideas to copy
- Advanced tricks
You can also find:
- Paper squishy challenges
- Giant paper squishies
- ASMR squishy sounds
Tip: Download a DIY squishy app if you want more ideas. They often have templates you can trace.
Make It a Habit
Once you start, you’ll want to keep making more. Try one squishy every weekend. Use themes to guide you:
- Week 1: Breakfast foods
- Week 2: Animals
- Week 3: Characters
- Week 4: Weather (clouds, sun, rain)
We hope you find joy in creating your own paper squishies.
Soon, you’ll have a whole shelf full. Store them in a box or hang them on a wall. They also make cute decorations. The bigger your DIY Paper Squishy, the better it will squish and rise again.
Bonus Tips
Keep your squishies looking good:
- Don’t overstuff—it’ll pop open and won’t squish properly. When filling a Paper Squishy, it is important not to overfill it to ensure it can squish properly.
- Use clear tape for a clean look
- Keep edges smooth for less tearing
- Use strong markers so the color stays bright
- Let ink dry before taping over it
Video Tutorials for Paper Squishies
If you prefer learning by watching, there are plenty of great video tutorials available on YouTube that walk you through making paper squishies step-by-step. These videos cover everything from basic shapes to advanced designs and offer helpful tips to perfect your craft. Watching tutorials can be especially useful for visual learners and beginners.
Troubleshooting Tips
Making paper squishies is fun, but sometimes things don’t go as planned. Here are some common issues and how to fix them:
- Tape peeling off: Use clear, strong tape and press firmly along the edges to ensure it sticks well.
- Overstuffed squishy won’t squish: Avoid filling too tightly; leave some air inside for better squishing.
- Shape distortion: Make sure both paper shapes are identical and aligned before taping.
- Squishy leaks stuffing: Check for any gaps or holes in the tape and seal them carefully.
Advanced Techniques to Try
Once you’ve mastered the basics, try these creative ideas to make your paper squishies stand out:
- Add scented stuffing for a pleasant aroma.
- Use glow-in-the-dark paint or markers for a fun nighttime effect.
- Layer different colored papers for a 3D or ombre look.
- Incorporate textures like bubble wrap or foil for extra sensory fun.
Seasonal and Holiday Themes
Make your paper squishies fit the season or celebrate holidays with themed designs:
- Halloween pumpkins, ghosts, or bats.
- Christmas trees, stars, or candy canes.
- Summer fruits like watermelons and pineapples.
- Valentine’s hearts and cute love-themed squishies.
Eco-Friendly Crafting Tips
Keep your crafting sustainable by:
- Using recycled paper or scrap paper from old projects.
- Reusing stuffing materials like old pillow stuffing or fabric scraps.
- Choosing biodegradable or recyclable tape when possible.
- Avoiding single-use plastics in your materials.
Share your creations and get inspired by others! Post your paper squishies on social media using hashtags like #PaperSquishyDIY or #SquishyCrafts. You can also join online groups or forums to exchange ideas and participate in fun challenges or contests.
Printable Templates for Easy Crafting
To help you get started, download and print templates for popular paper squishy shapes like animals, food, and emojis. Templates make it easier to trace and cut perfect shapes, especially if you’re new to the craft.
Customization Ideas
Make your squishies truly unique by adding:
- Stickers or googly eyes for personality.
- Glitter or metallic pens for sparkle.
- Fabric scraps or felt for texture.
- Colorful patterns or hand-drawn designs with markers.
Safety Tips for Crafting with Kids
Crafting with kids is rewarding but requires supervision:
- Always supervise when using scissors or sharp tools.
- Use child-safe scissors and non-toxic markers.
- Encourage gentle handling of squishies to avoid tearing.
- Keep small parts like stickers or stuffing away from very young children.
If you love paper squishies, you might also enjoy other DIY crafts such as:
- Homemade slime for tactile fun.
- Stress balls made from balloons and flour.
- Simple origami projects using colorful paper.
- DIY fidget toys to keep hands busy.
Adding these ideas and tips will keep your crafting journey exciting and help you create amazing paper squishies every time. Have fun, and keep squishing!
Displaying and Storing Your Paper Squishies
You made paper squishies.
Now what?
Time to show them off.
Time to keep them safe.
There are tools for this. There are services too. You can make a cool display case. You can make a custom storage box. Try adding a ticket to each squishy. Try adding a tag. This helps you track favorites. This helps you remember when you made them. Need inspiration? Watch YouTube videos. See how other crafters do it. See how they display their paper squishies. See how they organize them.
Store your paper squishies right.
Keep them away from direct sunlight.
Keep them away from moisture.
This helps the paper stay bright. This prevents damage over time. Take extra time to display your creations. Take extra time to store them. This means you can enjoy them for years. This means you can improve your collection for years. Line them up on a shelf. Hang them on a wall. Keep them in a decorated box. Your paper squishies will always be ready. Ready to squeeze. Ready to admire.
Connecting with Paper Squishy Communities
Making paper squishies is great. But sharing is better. There are lots of communities online. You can connect with other fans. You can swap ideas. You can learn new things. Watch videos. Explore content. See what others make. Get inspired. Your next project awaits. Join forums. Join social media groups. Get access to tools. Get tips. Get feedback. Your skills will improve.
Choose to participate. You’ll discover new techniques. You’ll find answers. You might make friends. Friends who love paper squishies too. Many sites use cookies. They use online tools. They help you find content. Content that interests you. Navigation is easy. Staying updated is simple. So jump in. Share your work. Watch your creativity grow. Watch your collection grow too.
Making and Selling Your Own Paper Squishy Products
Ready to make money from paper squishies?
Yes, you can.
Your hobby can pay.
How?
With creativity. With the right tools. With good services.
You can start making them. You can start selling them. Online is best.
Use high-quality paper. Pay attention to details. Make them stand out.
Why?
Because details matter.
There are videos. There are tutorials. Watch them. Learn new techniques. Improve your craft.
Where can you sell?
Online marketplaces work. Social media works. Local craft fairs work too.
Use cookies. Use online tools. They help manage business. They track sales. They connect with customers.
Keep creating. Keep selling. You’ll find new ways. Ways to improve products. Ways to grow business. It takes time.
Many people want unique items. They want handmade items. Your paper squishies could be big. Really big.
So what should you do?
Tap into your entrepreneurial spirit. Start sharing your creations. Share them with the world.
The choice is yours.
That’s a Wrap
There you have it—tons of fresh, fun paper squishies ideas. Keep creating, keep coloring, and keep squeezing. Try out new things and make them your own. You don’t need a lot of stuff—just time, paper, and your imagination. Next time you’re bored, think of your favorite snack, show, or animal and turn it into a squishy. With these paper squishies ideas, you’ll never run out of fun again. Different shapes and sizes can significantly affect the squishing experience of paper squishies.
Want more ideas or templates? Just say the word.
FAQ’s
Where can I find tutorials or more inspiration for making paper squishies?
You can find helpful resources by searching for ‘paper squishy tutorial’ on YouTube, which offers step-by-step videos, printable templates, and creative ideas to try.
How do I assemble and shape my paper squishy?
Cut out two identical shapes, tape the edges leaving a small hole, stuff it with tissue or cotton, then tape it shut. Using two matching shapes back-to-back creates the best squishy effect.
What are some easy ideas for starting with paper squishies?
Easy ideas to start with include mini milk cartons, happy hamburgers, sleepy pandas, rainbow popsicles, and donuts with sprinkles. Food-themed paper squishy designs are popular among enthusiasts. These simple designs are fun and require minimal materials.
How can I design my own paper squishy to make it unique?
You can create a unique paper squishy by choosing a theme, using different shapes, adding layers like ears or wings, and incorporating textures such as bubble wrap or foil. Adding details like patterns, glitter, or stickers also helps make it one-of-a-kind.
What materials do I need to make paper squishies at home?
To make paper squishies, you’ll need basic materials such as paper (like cardstock, construction paper, or printer paper), tape, scissors, markers or colored pens, and stuffing materials like cotton or foam.


