

Key Takeaways
- Paper weaving uses paper strips and a simple over-under pattern to create colorful art without a yarn loom.
- This paper weaving art tutorial works well for classrooms, homeschooling, kindergarten, and first weaving projects for kids ages 5–12.
- You will learn how to prepare strips, cut slits, start the first strip, and build neat warp and weft strips.
- The guide includes troubleshooting, weaving patterns, more ideas, and variations for advanced weaving projects.
- You only need basic materials: copy paper, cardstock, scissors, pencil, glue stick, and tape.
Introduction to Paper Weaving
Paper weaving is an accessible and visually striking art form that requires minimal equipment to start. It mimics textiles by using paper instead of yarn: one sheet becomes the warp, and loose horizontal strips become the weft.
Many children first meet simple paper weaving in elementary art classes, often grades 1–3. Warp refers to the stationary, vertical background strips that form the structural base of paper weaving projects. Weft refers to the loose, horizontal strips that you thread over and under the warp in paper weaving.
The simplest way to start paper weaving is with a single sheet of paper for the warp and one or more sheets of contrasting colors for the weft, using a plain weave technique of alternating over and under. This introduction covers the basics, then moves into creative variations and more ideas.
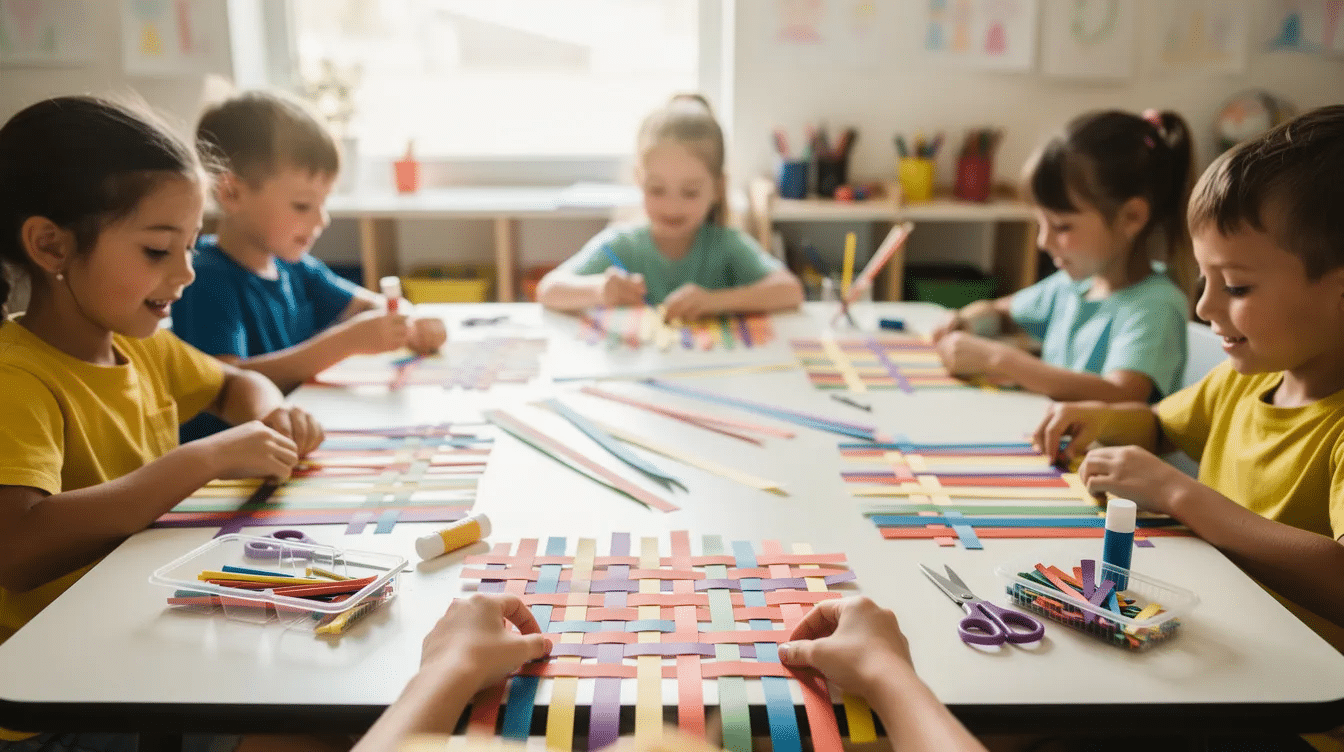
Why Teaching Weaving Matters for Kids
Adults teach weaving because it is more than a fun craft. Teaching paper weaving helps children develop fine motor skills, pattern recognition, hand-eye coordination, and listening skills.
Cutting, guiding, and sliding weaving strips builds control. Using both hands together strengthens bilateral coordination. The over-under sequence also helps students predict, repeat, and fix mistakes.
A small early-childhood study reported fine motor score gains after weaving activities with children ages 5–6, supporting what many teachers observe in class (ResearchGate). Start ages 5–6 with support; try narrower widths and complex patterns from age 8+.
Paper Weaving Supplies
Use this checklist to prepare materials before you teach:
Supply | Best use |
|---|---|
copy paper | Practice and quick projects |
Cardstock, 65–80 lb | Sturdy weaving projects |
Watercolor paper or heavy drawing paper | Strong warp base |
scissors | Kid-safe cutting |
paper cutter | Adult prep for many strips |
craft knife and cutting mat | Precision work |
ruler and pencil | Marking straight vertical lines |
glue stick or glue | Secure strip ends |
clear tape | Back-side reinforcement |
painter’s tape | Hold the base still |
For paper weaving, you can use various types of paper such as copy paper, cardstock, scrapbooking papers, and even printed or decorative papers. Using a sturdy cardstock, watercolor paper, or heavy drawing paper for the warp provides structural integrity and resists tearing. Pliable materials like colored copy paper or magazine pages are recommended for the weft, as they slide smoothly through the gaps. |
Common tools needed for paper weaving include scissors, a ruler, a pencil or marker, and optionally, a craft knife, cutting mat, and paper cutter for more precise cuts. If you’d like to explore top craft paper supplies for creative projects or compare the best types of paper for craft, consider how different weights and textures affect cutting and weaving. Cutting mats and craft knives are necessary tools for creating perfectly straight, uniform strips for paper weaving.
Preparing Paper Strips
Neat, even paper strips make the process easier. For a first weaving experience, it’s best to start with straight, even pieces of paper strips cut to approximately 1-1.5 inches wide and 8.5 inches long.
When preparing paper strips for weaving, it is recommended to cut them into even widths, typically between 1/2 inch to 1 inch wide and 8.5 inches long for standard projects. Cut along the long edge so each weft strip reaches across the base.
Use different colors with strong contrast, such as a yellow background with blue and red strips. When you’re ready to branch out into more projects, a site like Simply Paper Crafts can provide additional inspiration and ideas. When teaching paper weaving, it’s important to check students’ cuts to ensure they are even and consistent, which helps in the weaving process. Keep edges straight to avoid friction that can cause strips to catch and buckle during weaving.
Setting Up the Base for Simple Paper Weaving
Think of the base sheet as the loom. A loom in paper weaving is typically a solid, uncut border left at the top or edges of the base paper to keep warp strips bound together.
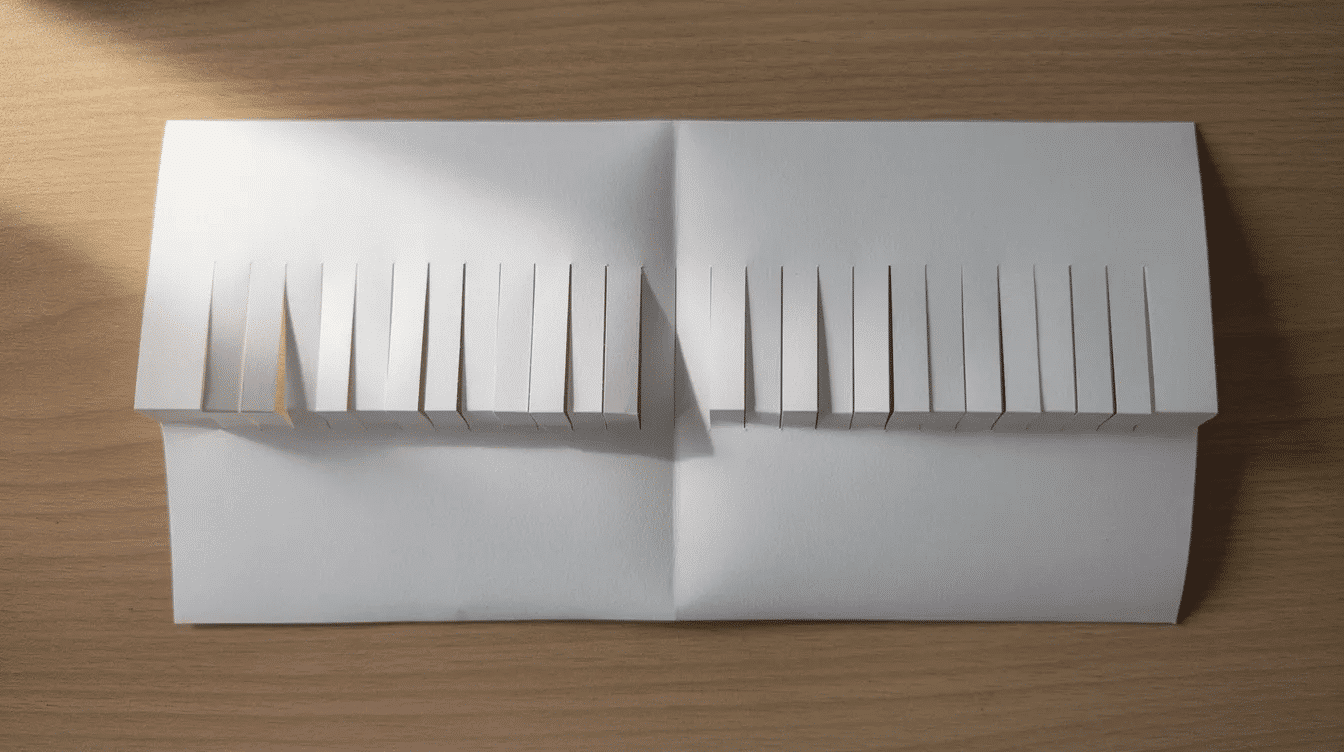
Fold an 8.5 x 11 sheet in half, hamburger style, bringing the short edges together. Draw a light pencil stop-line about 1 inch from the open edge. From the folded edge, cut slits toward that line, spaced about 1 inch apart.
Carefully unfold the sheet. The slits become parallel warp strips. Using low-tack painter’s tape is essential for holding warp (vertical base) strips in place during weaving, especially with young students.
Step-by-Step: Weaving the First Strip
The first strip sets the pattern, so go slowly. Lay the base with the fold at the top and the slits running vertically.
Choose a bold weft strip. Start under the first warp strip, then over the next, then repeat: under, over, under, over. The Plain Weave is the foundational building block for all weaving techniques, following a strict over-under sequence to create a balanced checkerboard pattern.
Push the first strip gently to the top fold. Add a small piece of tape or a dab of glue stick on the back at both ends to secure it.
Building the Weaving Pattern
Each new row uses the opposite pattern. If the first strip starts under the first warp, the second starts over the first warp, then under the next.
Have kids say, “over, under, over, under,” as they weave. Continue adding weaving strips, sliding each one snugly against the previous row.
Before finishing, check for missed changes. Glue or tape each end on the back, then trim uneven edges. The result is a tight, colorful mat with a clear repeat, and students often enjoy exploring other fun paper activities for creative minds once they master this technique.
Teaching Strategies and Troubleshooting
For teaching weaving to groups, model on a large board, under a document camera, or through short videos students can watch again. An art teacher can also use oversized warp and weft strips for a clear example.
Common fixes:
- Tearing: use sturdier paper and pull less.
- Skipping slits: point to each opening before weaving.
- Buckling: straighten strips and keep edges clean.
- Reversed row: back the strip out and restart calmly.
- Frustration: plan a smaller mat for the first project.
Pair older students with younger kids. Teachers can prepare trays by color combinations and let early finishers add borders or simple decorations, or move on to cute paper craft ideas for fun DIY projects that build on the same cutting and gluing skills.
Creative Variations and More Ideas
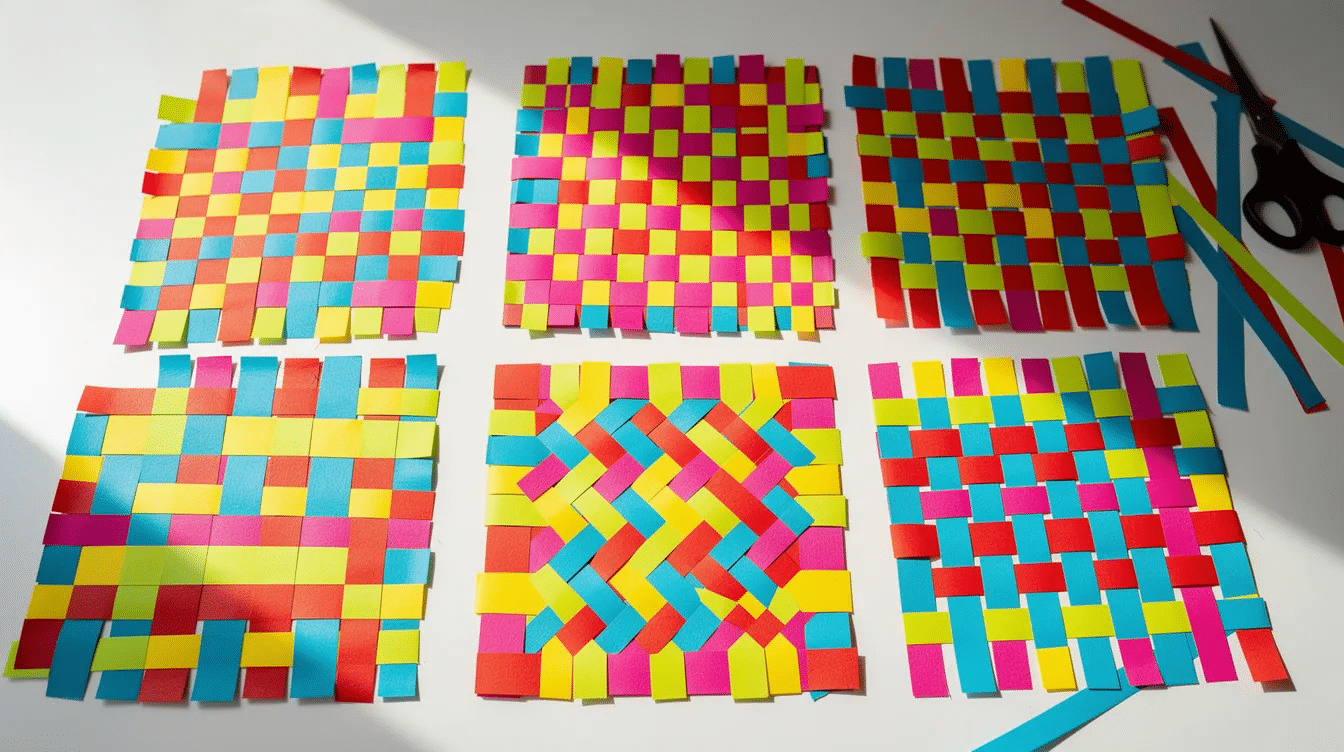
Once students understand simple paper weaving, the possibilities feel endless. Plain Weave, Basket Weave, and Double Strips are common paper weaving techniques that create distinct patterns and textures, much like other dimensional arts such as paper quilling for beginners.
Try these ideas:
- Alternate red-blue-red-blue for stripes and checkerboards.
- Mix 0.5 inch and 1 inch widths. Using different widths for warp and weft strips can create a more complex look in paper weaving.
- The Basket Weave expands on the Plain Weave by creating larger blocks of color and texture.
- The Twill Weave introduces diagonal movement into the artwork by weaving the weft over 2, under 1 to create a staircase effect.
- Use autumn colors in October 2026, winter silvers, school colors, or greeting card fronts, or pair woven backgrounds with easy paper snowflakes for winter decor.
- Variations in paper weaving can include cutting warp or weft strips of different widths or shapes, creating openings in the strips, or using decorative papers to enhance visual complexity.
Extending Paper Weaving into Art and Design
Paper weaving connects directly to pattern, rhythm, contrast, and design. Students can sketch on graph paper first, treating each square as over or under.
Advanced paper weaving techniques can involve using different weave structures, such as twills, by numbering the warp strips and following a specific lift plan to create complex patterns.
Weaving with printed and decorative papers can add visual complexity to your projects, allowing for selective shaping of the warp strips to showcase designs. Watercolor paper can be used for more dimensional paper weavings due to its stiffness, allowing for interesting patterns and textures.
Students can also weave journal sentences, vocabulary, or poems, then mount finished work as a background for drawing, collage, painting, fabric scraps, metallic paper, vellum, or recycled packaging. Makers who enjoy surface texture might even experiment with handmade paper sheets for creative projects or think about which woven designs could become paper crafts that sell well at markets. Printable templates and labels from creative things to print on paper can also help organize supplies and decorate finished weavings. For a helpful visual reference, see this basic paper weaving guide.
FAQ
How early can children start paper weaving?
Many children can start around ages 5–6 if an adult pre-cuts the base and paper strips. Independent cutting is usually easier around ages 7–8. Use fewer, wider strips for younger kids and narrower strips for older students.
What if I don’t have cardstock? Can I use regular printer paper?
Yes. Regular 8.5 x 11 printer paper works for practice and small projects. Cardstock is sturdier and less likely to tear. For extra strength, layer two sheets of copy paper or mount the finished weave on another sheet.
How do I stop the paper weavings from falling apart over time?
Glue or tape each weft end on the back. Mount the finished paper weave on a larger background sheet, then press it under a heavy book until dry. For long-term display, use acid-free glue or double-sided tape.
Can paper weaving be adapted for students with fine motor challenges?
Yes. Use wider strips, fewer slits, pre-taped bases, and hand-over-hand support. You can also number the slits or color every other slit so the over-under sequence is easier to follow.
How can I integrate paper weaving into other subjects?
Use math sequences for weaving patterns, flags in social studies, color wheels in science and art, or text strips with vocabulary, historical dates, and short poems. Display finished projects on bulletin boards tied to a unit or season.
Paper weaving is simple to plan, quick to set up, and rich enough to revisit. Start with the plain weave today, then let students explore new materials, patterns, and creative ideas as their confidence grows.



