

Key Takeaways
- This is a decorative paper cup craft tutorial, not a drink-safe drinking cup for water or beverages.
- Kids, beginners, and school groups can follow this step by step paper craft guide with simple supplies.
- You’ll learn how to choose the right paper, including why to avoid bleached or lined paper for drinks.
- The project uses easy materials found at home or in classrooms in 2026, such as a square sheet, markers, glue, and stickers.
- Once you master the basic fold, you can create holiday decorations, treat holders, tiny houses, and other fun crafts.
Introduction to Paper Cup Crafts
A paper cup craft is a simple folded or decorated cup-shaped project made from paper. In this guide, the goal is to create a decorative paper cup, not a cup designed to hold water, hot liquids, or other drinks.
There is a big difference between a functional drinking cup and a fun paper craft project. A real drinking cup needs food-safe materials, a sealed surface, and a structure that can repel water. A basic origami cup, on the other hand, is best for decoration, pretend play, dry treats, or small desk items.
This tutorial is ideal for kids’ activities, school art lessons, weekend crafts, and paper craft projects for beginners. Paper crafts like this are easy and inexpensive projects that can be made with children, and they work well for holidays, classroom themes, and seasonal displays.
The classic folded paper cup has a long history in origami and appears in early paper-folding sources under different names. If you enjoy the background of traditional folding, the history of origami is worth exploring through sources such as Britannica’s overview of origami.
Here’s what you’ll learn: materials, folding, decorating, safety tips, and creative ideas for using your finished cup.
Materials and Tools You’ll Need
Having the right materials ready makes the step by step process smoother, especially when crafting with kids.
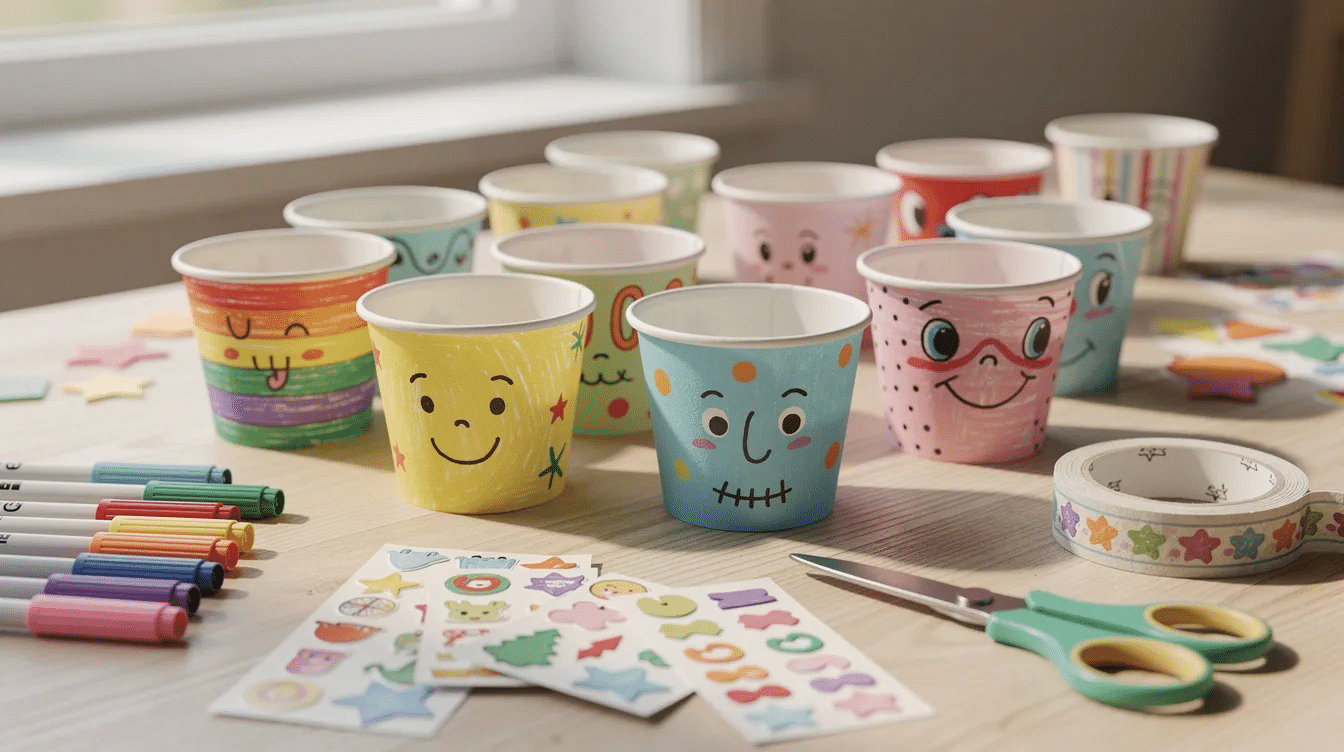
You can make this paper cup craft with supplies you probably already have at home or school, especially if you keep basic craft paper supplies for creative projects on hand:
Material or tool | Best use |
|---|---|
Plain printer paper | Easy folding for beginners |
Colorful craft paper | Bright decorative cups |
Light cardstock | Stronger cup shape |
Pencil and ruler | Measuring a square piece |
Scissors | Cutting the sheet into a square |
Non-toxic glue stick | Attaching decorations |
Markers, crayons, colored pencils | Drawing patterns and faces |
Stickers and washi tape | Adding quick decoration |
Optional googly eyes | Animal faces or cartoon cups |
Optional plastic wrap, cling wrap, waxed paper, or kitchen parchment | Splash resistance for display only |
For the basic cup, use a perfectly square piece of paper. A 15 cm x 15 cm square is a good size for beginners. Alternatively, you can trim an A4 sheet into a square for a larger cup, keeping in mind how different types of paper for craft can affect the look and strength of your cup. |
Use uncoated paper whenever possible. It is easier to fold, easier to draw on, and less likely to smudge than glossy paper. Light cardstock is useful if you want the cup to last longer, but very thick paper can be hard for small hands to crease.
Avoid bleached or lined paper if the cup might be used near food or drinks. Using bleached or lined paper for making a paper cup is not recommended, as the chemicals and inks can leach into the liquid. Lined paper also contains ink that may bleed if it gets wet.
If your project only needs to look like a cup, plain craft paper is perfect. If you want to experiment with a more water-resistant version, use a square of waxed paper or kitchen parchment, or line the inside with plastic wrap to prevent leaks. Just remember: this tutorial keeps the cup decorative.
Safety note: Do not use this craft for hot liquids. Wax can melt, thin paper can quickly saturate, and wet paper may burn or collapse near heat.
How to Make a Simple Paper Cup (Step by Step)
This is the core “how to make a paper cup craft step by step” tutorial.
Start with a 15 cm x 15 cm square piece of paper, or trim a larger sheet into a square. The more accurate your square, the cleaner the final cup shape will be.
Step 1: Make a square
If you are starting with rectangular paper, fold one corner across to the opposite side so the edges line up. Cut off the extra strip. Open it up, and you should have a perfectly square piece.
Step 2: Fold the paper diagonally
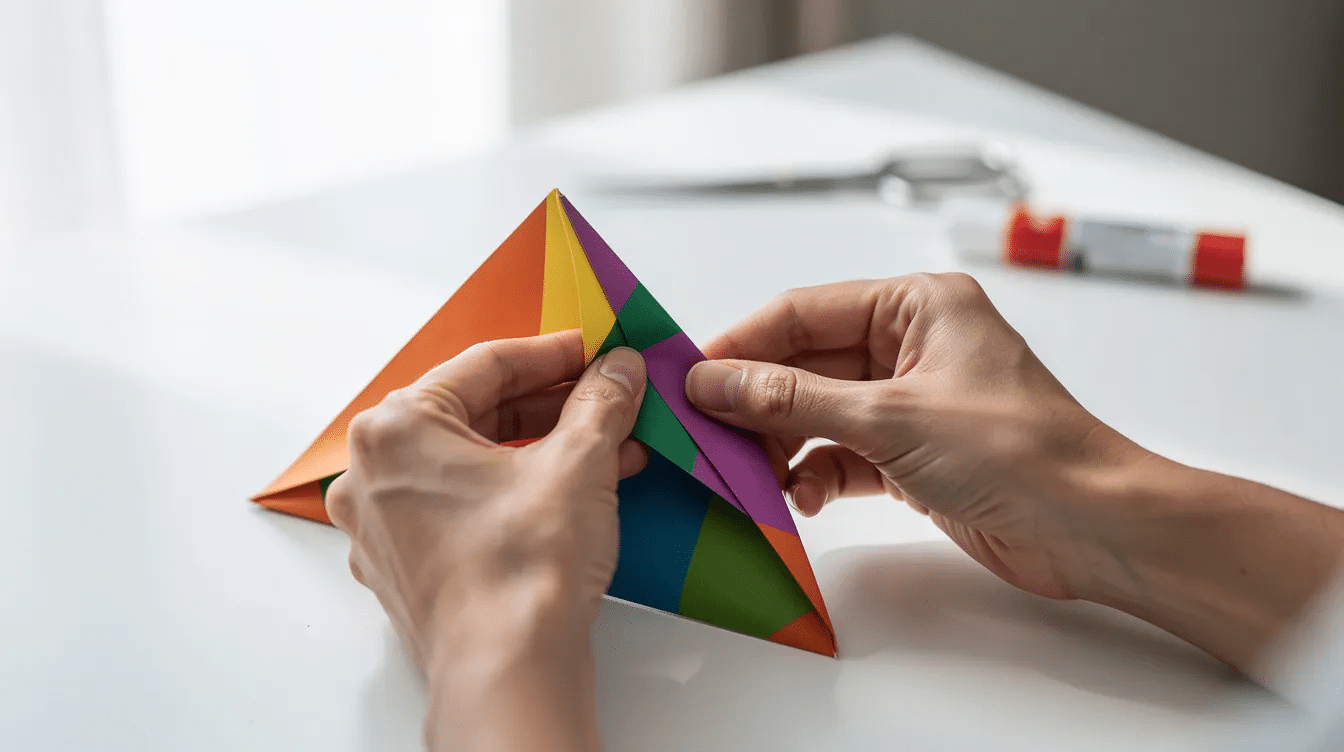
Place the square in front of you like a diamond. Fold the paper diagonally so one corner meets the opposite corner. Press the crease firmly.
You should now have a triangle.
Make sure the two identical corners at the bottom line up evenly. If the edges do not perfectly overlap, unfold and try again.
Step 3: Position the triangle
Turn the triangle so the long folded edge is at the bottom and the top point faces away from you. The opening should be at the top.
You will now work with the left and right identical corners.
Step 4: Fold the first lower corner across
Take the right corner and fold it across the triangle toward the opposite side. The point should land near the left edge.
Crease the fold firmly. This creates one side of the cup pocket.
Step 5: Fold the other corner across
Take the other corner and fold it across in the opposite direction. This second fold should cross over the first fold.
The two folds should form a neat cup shape. If the sides look uneven, check your previous folds and adjust before pressing the paper flat.
Step 6: Fold down the top flaps
You will see two top flaps at the upper opening. Fold the front flap down over the crossed corners. Then turn the cup over and fold the back flap down as well.
These top flaps help lock the form in place.
Step 7: Open the cup
Gently place your fingers inside the opening and separate the inner pocket. Do this slowly so the paper does not tear. Pinch the bottom slightly to help the cup stand.
You now have a simple origami paper cup.
Step 8: Strengthen it if needed
For a sturdier craft cup, you can double the paper before folding by placing two sheets together. Doubling the thickness of the paper used to construct the cup can enhance its durability and ability to hold liquids.
That said, even a double layer is not the same as a real drink-safe cup. The basic paper cup is best for dry items only, such as a wrapped small snack, paper clips, paper flowers, or jelly beans in a sealed wrapper.
If you want to create a waterproof paper cup, use a square of waxed paper or kitchen parchment, or line the inside with plastic wrap to prevent leaks. This can make the cup liquid resistant for short display use, but it is still not ideal for drinking.
Decorating Your Paper Cup Craft
Now that the basic cup is folded, you can turn it into a personalized paper craft project.
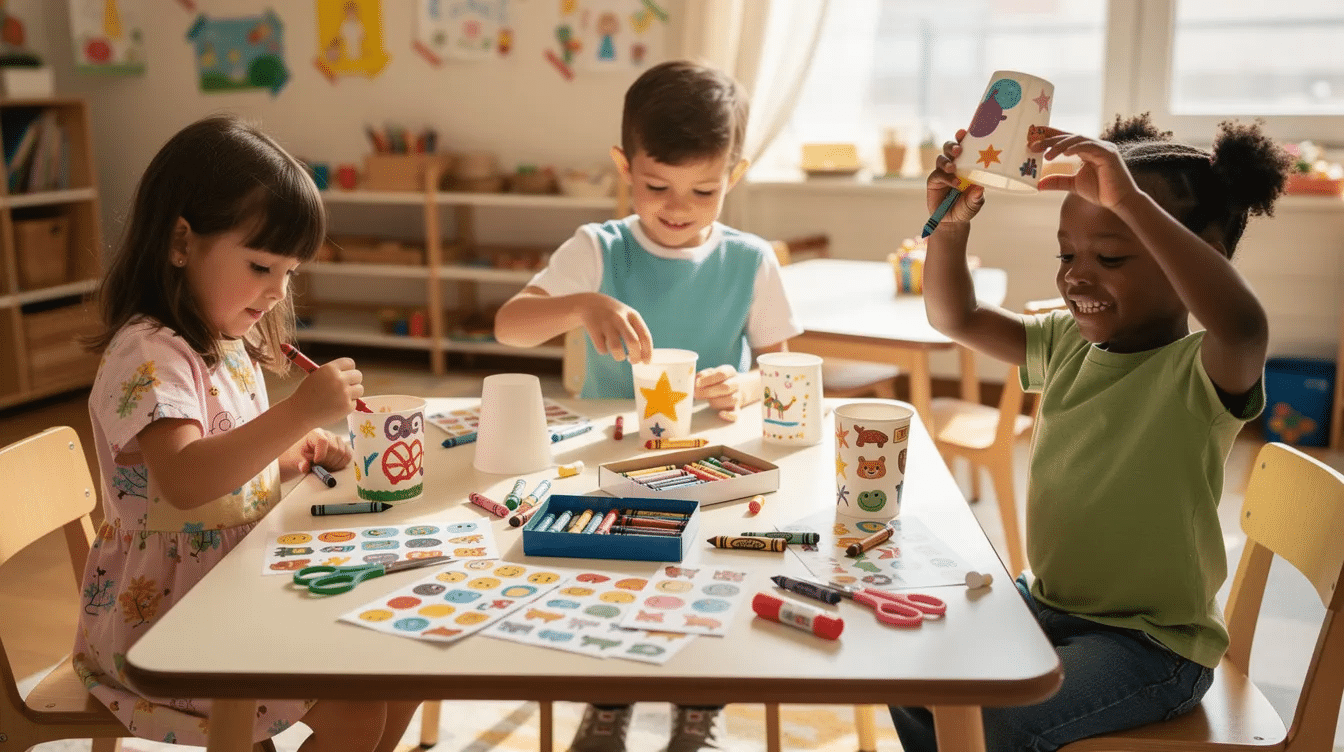
The easiest way to decorate is to draw directly on the outside. Use markers, crayons, or colored pencils to add:
- Spring flowers
- Stars and moons
- Polka dots
- Cartoon faces
- Rainbow stripes
- Fall leaves
- 2026 holiday motifs
- Name tags for a party table
Paper cups can be used in arts and crafts projects such as creating colorful and blooming designs. For example, you can draw flower stems up the sides and glue paper petals around the rim, similar to many cute paper craft ideas for fun DIY projects.
To make animal cups, cut ears from colored paper and glue them near the top. Add whiskers, a nose, and eyes to create a cat, bunny, bear, or fox. Googly eyes are fun, but avoid them for toddlers because they can be a choking hazard.
You can also add a handle by cutting a narrow strip of paper and gluing each end to the side of the cup. Let the glue dry before lifting the cup by the handle.
For trim, add washi tape around the rim or base. This gives the cup a finished look and can also reinforce the edge. Do not soak the paper with wet glue or paint, because too much moisture can weaken the shape.
Here are a few quick decoration ideas:
Theme | How to create it |
|---|---|
Bunny cup | Add long ears, a pink nose, and whiskers |
Starry night cup | Draw moons and stars with metallic markers |
Mini gift cup | Fill with wrapped candies or tiny stationery |
Flower cup | Glue paper petals around the rim |
Funny face cup | Add eyes, eyebrows, and a big smile |
The cup can also become a mini gift container for wrapped candies, paper flowers, erasers, stickers, or small stationery items. If you add edible treats, keep them wrapped so they do not touch the paper directly. |
Creative paper cup crafts can include a variety of projects, such as making decorative items or functional objects, which are great for engaging children in arts and crafts activities, and you can find even more creative paper cup craft ideas for fun projects to extend this activity.
Safety, Paper Choices, and Eco-Friendly Tips
Not every paper is suitable for every use, especially near food or drinks.
Bleached paper, glossy flyers, heavily printed packaging, and lined paper should be avoided for drinking or direct food contact. Ink, coatings, adhesives, and other chemicals can move into liquid, especially if the paper becomes wet.
This matters because plain paper will absorb liquid. Once it absorbs moisture, it can quickly saturate, soften, leak, or fall apart. A basic folded craft cup is absolutely not meant to hold water for regular use.
If you want a display cup that can resist a few splashes, you can use waxed paper, kitchen parchment, plastic wrap, or cling wrap as a liner. These materials may help repel water for a short time, depending on how carefully you line the inside. But for real drinks, use proper food-safe cups instead.
Food-contact packaging is tested for chemical migration under specific conditions. If you want to understand why materials matter, this overview of food contact safety and migration in paperboard explains how paper, ink, coatings, and adhesives can affect safety.
For decorative paper crafts, safer and simpler choices include:
- Plain uncoated craft paper
- Recycled craft paper
- Clean packaging paper
- Old calendars with non-glossy pages
- Misprinted sheets from home or school
Eco-friendly crafting is also about using what you already have. Save clean paper scraps, trim pieces into smaller decorations, reuse old envelopes or packaging, or explore vintage paper craft ideas using old materials before putting them in the recycling bin.
For child safety:
- Supervise scissor use.
- Choose non-toxic markers, crayons, and glue.
- Keep small decorations away from toddlers.
- Wash hands after handling heavily printed paper.
- Avoid sharp tools, strong adhesives, and solvent-based glue.
If you want to log classroom supplies or project materials, keep a simple account of paper type, glue type, and decorations used. This helps teachers repeat the project safely.
Creative Project Ideas Using Paper Cup Crafts
Once you master the basic paper cup, you can adapt it to many themed projects.
Paper cup crafts are easy and inexpensive projects that can be made with children, suitable for various holidays and seasonal themes. They are also a great way to connect folding, coloring, and storytelling in one activity, much like other fun paper activities for creative minds of all ages.
Here are a few ideas to try in 2026, and you can always browse Simply Paper Crafts for more inspiration:
Seasonal and holiday ideas
- Easter baskets: Decorate a cup with pastel colors and add a paper or pipe cleaner handle.
- Halloween treat holders: Draw pumpkins, ghosts, bats, or monster faces.
- Winter holiday table decorations: Use white, silver, green, or red paper and add paper snowflakes, or try folding your own using an easy paper snowflake tutorial.
- Spring flower cups: Fill the cup with tissue paper flowers or folded paper blossoms.
- Fall table crafts: Add leaf shapes, acorns, and warm orange or brown patterns.
Cupcake liner flower baskets can be made using a paper cup as the basket and a beaded pipe cleaner as the handle, making it a fun craft for kids during Easter. Add a cupcake liner flower inside the cup for a colorful spring display.
Classroom activities
In early grades, make a set of labeled cups for sorting:
- Colors
- Letters
- Numbers
- Shapes
- Sight words
- Craft supplies
Students can decorate each cup, then use them for matching games. This turns a simple craft into a hands-on learning activity.
Party uses
For birthday parties, classroom events, or family celebrations, use paper cup crafts as:
- Name-card holders
- Confetti cups
- Photo booth props
- Mini favor containers
- Character decorations
You can write each guest’s name on a small sign and tuck it into the cup. You can also place a tiny paper flower or folded star inside each one.
Tiny houses and pretend play
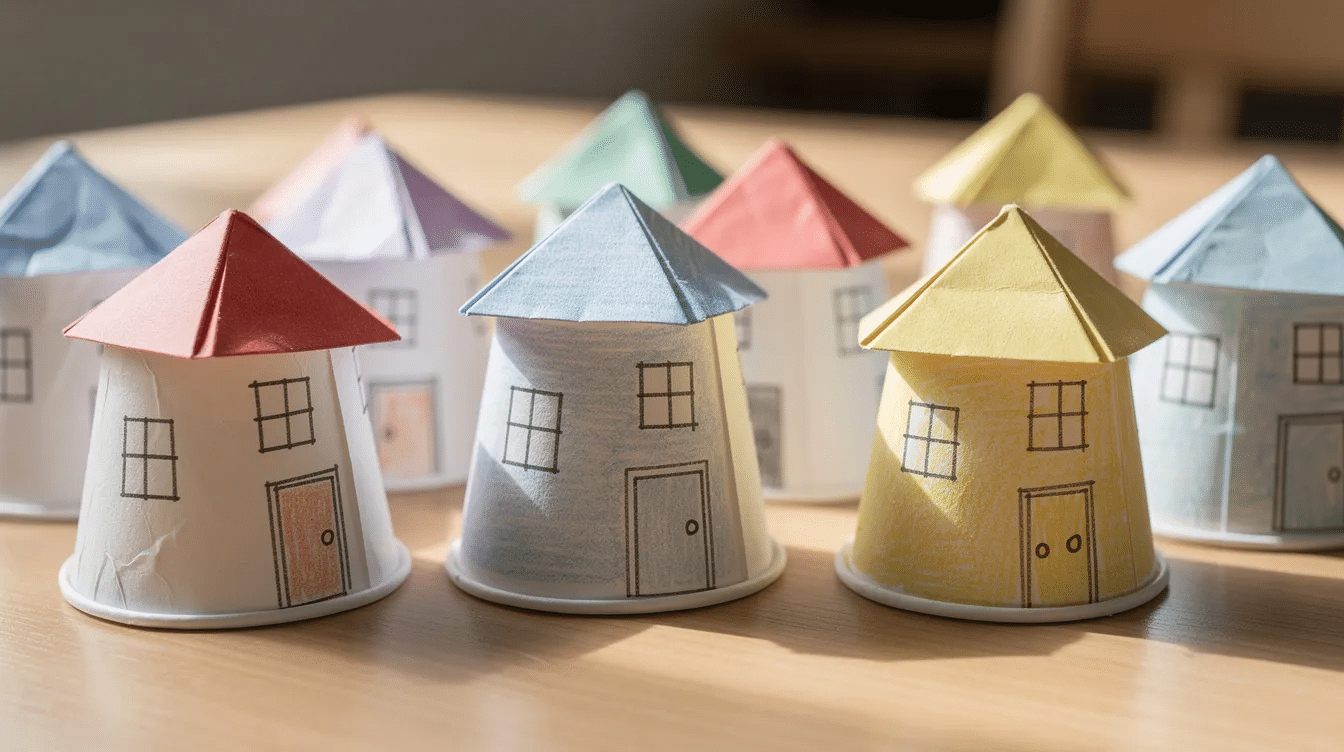
Inverted paper cups can be utilized to create charming tiny houses. Turn the cup upside down, draw a door and windows, and add a paper roof. Make several houses to create a village scene.
You can also combine this project with other paper crafts such as paper chains, cupcake liners, paper flowers, simple origami designs for every skill level, or printable pieces like signs and props from creative things to print on paper for every occasion, plus folded animals or mini trees.
FAQ
Can I use this paper cup craft to hold real water or drinks?
No. The basic paper cup from this tutorial is not designed to hold water or beverages safely. It may leak, soften, or collapse.
Lining the inside with plastic wrap or using waxed paper can make it more splash-resistant, but it is still not ideal for regular drinking. Use proper food-safe cups for drinks and keep this project for decorations or dry items only.
What type of paper is best for a sturdy paper cup craft?
Medium-weight craft paper or light cardstock is best for a stronger, longer-lasting cup shape. Very thin notebook paper can tear when folded, while very thick board is difficult for kids to crease.
Uncoated paper is usually better than glossy paper because it is easier to draw, color, fold, and glue.
Is bleached or lined paper safe for kids’ paper crafts?
Bleached or lined paper is usually fine for simple crafts that do not touch food or drinks, especially when using child-safe supplies.
The main concern comes when liquid touches the paper. Liquids can pull ink or chemicals from the paper into food, drinks, or mouths. For sensitive skin or younger kids, choose plain paper and wash hands after crafting.
How can I store finished paper cup crafts so they don’t get crushed?
Nest the cups gently inside each other and place them in a shallow box or drawer. Keep them away from moisture, direct sunlight, and heavy objects.
To help each cup hold its shape, tuck a small tissue paper ball or scrap paper inside before storing.
Can younger children make this paper cup craft on their own?
Children around ages 6–8 can often fold the basic cup with guidance. Younger kids may need hands-on help, especially with the diagonal fold and the top flaps.
For preschoolers, pre-cut the paper to the right size and let them focus on decorating. Adults should handle or closely supervise cutting and any small decorations that could be a choking hazard.



