

Key Takeaways
- This paper lily flower tutorial makes a classic origami lily flower from one square piece of paper, no glue required.
- For making a paper lily, a square piece of paper is recommended, typically sized 15×15 cm (6×6 in).
- You’ll use step by step instructions for step 5, step 6, step 7, step 8, step 9, step 11, and step 13.
- The finished paper lily works in a bouquet, cards, table decor, or larger paper flowers projects.
- FAQ tips cover tearing, sizing, stems, and how to protect the flower.
Introduction: Why Make a Paper Lily Flower?
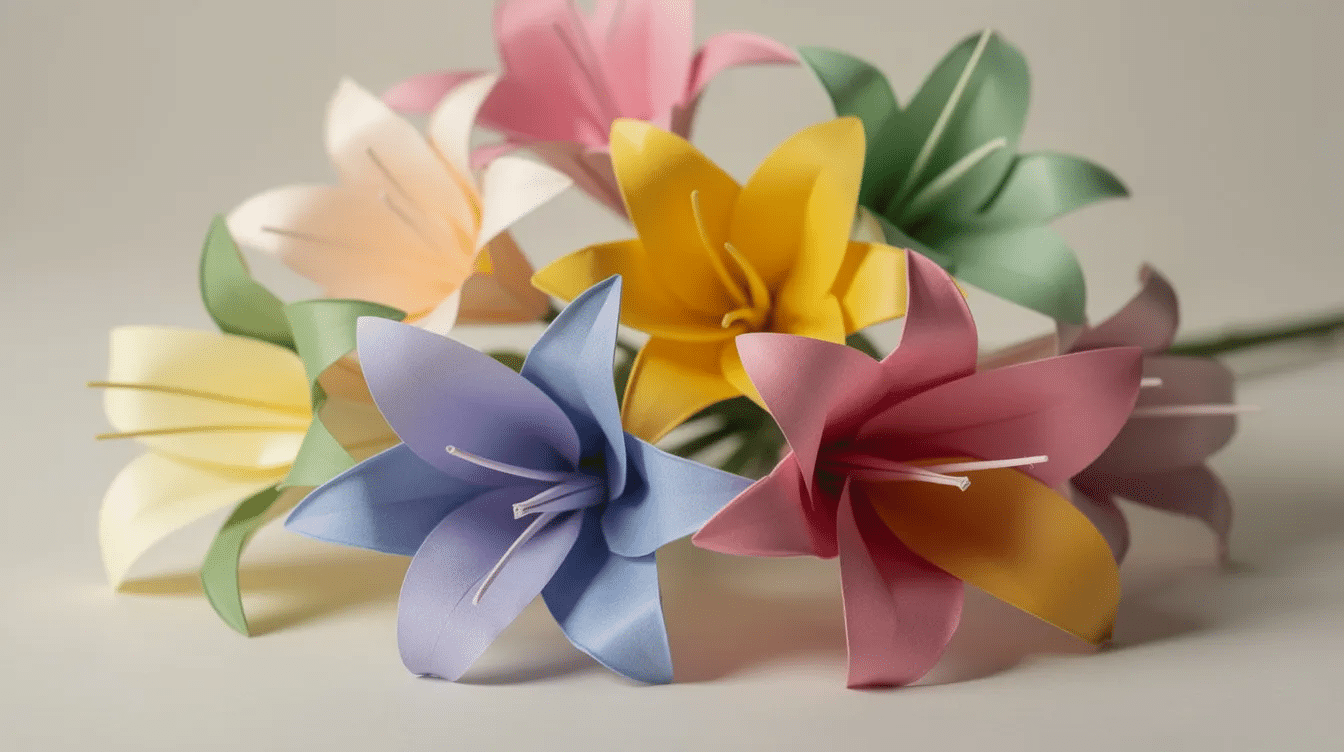
A paper lily is lovely because a flat sheet becomes a curled lily flower with pointed petals and a clean center. Making a paper lily is considered an easy and inexpensive craft, and it is fun for beginners who want a model beyond a tulip but simpler than many roses.
This 2026 post focuses on the traditional origami lily: folding paper only, not cutting and gluing. Expect 20–30 minutes for your first lily, then under 10 minutes with practice. Folding techniques involved in origami include basic folds, squash folds, and careful shaping to curl petals.

- Materials and Preparation
- Step‑by‑Step Paper Lily Base (Steps 1–4)
- Forming the Lily Petals (Steps 5–8)
- Shaping the Flower: Inside Folds and Petal Structure (Steps 9–13)
- Opening and Curling the Paper Lily Petals
- Adding Stems, Leaves, and Display Ideas
- Variations on the Paper Lily Flower
- FAQ: Paper Lily Flower Tutorial
Materials and Preparation
Use 1 square piece of origami paper, ideally 15×15 cm / 6×6 in. Start with a square piece of paper, ideally 15×15 cm (6×6 in), and fold it in half both horizontally and vertically, then turn it over.
You can use any type of paper to create a paper lily, as long as it is a quadrilateral shape, but colored paper is often preferred for aesthetic purposes. Kami origami paper is best; printer paper works if trimmed. Avoid thick cardstock. Tools such as a pencil or pen can be helpful for making precise folds and creases when crafting a paper lily.
Choose white, pink, orange, yellow, or violet for an iris-inspired look. To make paper from A4 or Letter into a square, fold one corner diagonally to the opposite edge, trim the excess bottom edge, then unfold.
Step‑by‑Step Paper Lily Base (Steps 1–4)
These folds create the waterbomb or square base used in many origami flower projects. Keep every line sharp.
Step 1: Make the First Cross Creases
Place the colored side up. Fold the paper in half horizontally, crease, unfold, then repeat vertically to create a middle cross.
Step 2: Add the Diagonal “X” Creases
Rotate so one corner faces you. Folding paper diagonally in both directions creates an ‘X’ crease pattern in origami. Unfold after each diagonal.
Step 3: Collapse into a Waterbomb / Square Base
Flip to the other side. All four corners of the paper are brought inward to collapse it into a flat triangle or square-base shape in origami. Flatten into a diamond, with neat flat sides and a bottom point.
Step 4: Align the Base for Petal Folds
Put the open flaps toward you and the closed tip at the top. If the model is uneven, re-crease before you continue.
Forming the Lily Petals (Steps 5–8)
To create the petals of the origami lily, you will need to perform a series of folds including mountain folds and squash folds on the flaps of the paper.
Step 5: Narrow the First Petal
Lift the top flap. Fold the bottom left edge to the center line, then fold the bottom right edge to the center, making a long triangle or kite.
Step 6: Sharpen the Petal Tip
In step 6, press the new edges with fingers, a pen cap, or bone folder. A crisp tip makes the paper lily flower look cleaner.
Step 7: Unfold to Prepare Inside Folds
In step 7, carefully unfold those two side folds. The crease lines should remain visible for the next move.
Step 8: Repeat Steps 5–7 on All Flaps
In step 8, repeat step 5, step 6, and step 7 on the remaining flaps. Rotate the model each time so every petal matches.
Shaping the Flower: Inside Folds and Petal Structure (Steps 9–13)
This is where the origami lily begins to form. Work slowly; tight folds can tear.
Step 9: Create the First Squash Fold
A squash fold involves opening up a flap, spreading it flat, and pressing it down. In step 9, open the creased flap and flatten it into a narrow diamond.
Step 10: Lock the Petal Fold
Use mountain folds to tuck the lower edges behind the center. The petal should sit straighter and hold its shape.
Step 11: Fold the New Top Flap Down
In step 11, fold the new top flap downward along the natural crease. The model should look like a pointed bud.
Step 12: Repeat the Inside Folds on All Sides
Repeat step 9, step 10, and step 11 on the other three flaps. Keep the middle diamonds even.
Step 13: Slim the Stem and Finalize the Base
In step 13, fold the bottom outer edges toward the central vertical line on the front and back. This narrows the stem area.

Opening and Curling the Paper Lily Petals
Separate the four petals gently. After folding the petals, adjust their angle to about 90° to give the origami lily a natural look, and you can curl the edges for added effect. Wrap each petal around a pencil, skewer, or paintbrush handle.
For a photo-ready picture, check the flower from every angle and balance the curl. Video tutorials for folding origami lilies can be found on platforms like YouTube, providing visual guidance for each step of the process. The video tutorial for making a paper lily often includes tips on how to achieve clean folds and the final shaping of the petals for a more natural look. Watching video tutorials can enhance the learning experience for beginners by visually demonstrating the folding techniques required to create an origami lily.
Adding Stems, Leaves, and Display Ideas
Roll green paper tightly, tape or glue the edge, and insert it into the base. Add leaves for life and balance. Use one cute lily on a card, or create an amazing bouquet for friends, weddings, Easter, or classroom crafts as part of your broader simply paper crafts projects or alongside easy paper stars made step-by-step.
Variations on the Paper Lily Flower
Try mini 7.5 cm squares, large 20 cm paper, metallic sheets, or hand-painted spots. For a kid version, trace a hand, curl the fingers into petals, and attach a stem. Combine with roses, tulips, and other paper flowers for more ideas, or explore the best tissue paper flowers for any occasion and creative crepe paper flower ideas for stunning DIY projects. If you share a photo this week, invite comments, and ask readers to subscribe or watch your diagrams again.
FAQ: Paper Lily Flower Tutorial
How thick can my paper be for an origami lily flower?
Use thin to medium paper, around 60–90 gsm. Heavy cardstock over 120 gsm is hard to squash and may crack, especially as you explore top origami designs for every skill level that involve more intricate folds.
What should I do if the petal tips keep tearing?
Use larger paper, soften your pressure near the tip, and curl slowly around a pencil instead of bending sharply; these gentle techniques also help when folding creative paper duck origami ideas.
Can I simplify the steps for kids or classroom projects?
Yes. The handprint lily is easier for a young kid. The classic origami lily is better for older children and adults.
How can I make my paper lily stand up in a vase?
Insert a rolled paper stem, skewer, or pipe cleaner into the base. Add leaves lower down for balance.
Can I seal or protect my origami lily so it lasts longer?
Mist lightly with clear matte sealer from about 30 cm away. Keep it out of moisture and strong sunlight. Hope you’re glad with your finished flower.



